Wade Hampton Gc is an 18-hole golf course in Cashiers, NC with a par of 72. It offers 8 tee sets: fazio tees (7,347 yards, slope 146, rating 75.7), mckee tees (6,860 yards, slope 142, rating 73.5), tournament tees (6,575 yards, slope 138, rating 72.2), wade hampton tees (6,370 yards, slope 136, rating 71.1), senior tourney tees (5,991 yards, slope 134, rating 69.2), founders tees (5,806 yards, slope 131, rating 68.2), super senior tees (5,238 yards, slope 119, rating 65.7), chimney top tees (4,914 yards, slope 113, rating 64.6). The hardest hole is #4, a par 5 playing 584 yards from the first tee.
Wade Hampton Gc
Cashiers, NC
Get PDF Yardage Book
We'll email you the PDF link. No spam, ever.
Create Your Game Plan
Pick your tees, enter your bag, and get a personalized shot-by-shot strategy for every hole.

A long par 5 that plays straightforward without significant doglegs, offering birdie opportunity for skilled players. Water and strategic bunkering frame the approach, with the green's position rewarding accurate positioning over distance alone.

A demanding par 4 that requires precision off the tee as the fairway narrows considerably in the landing zone. Bunkers and water hazards protect the approach, making this second hole a stern early test of accuracy.

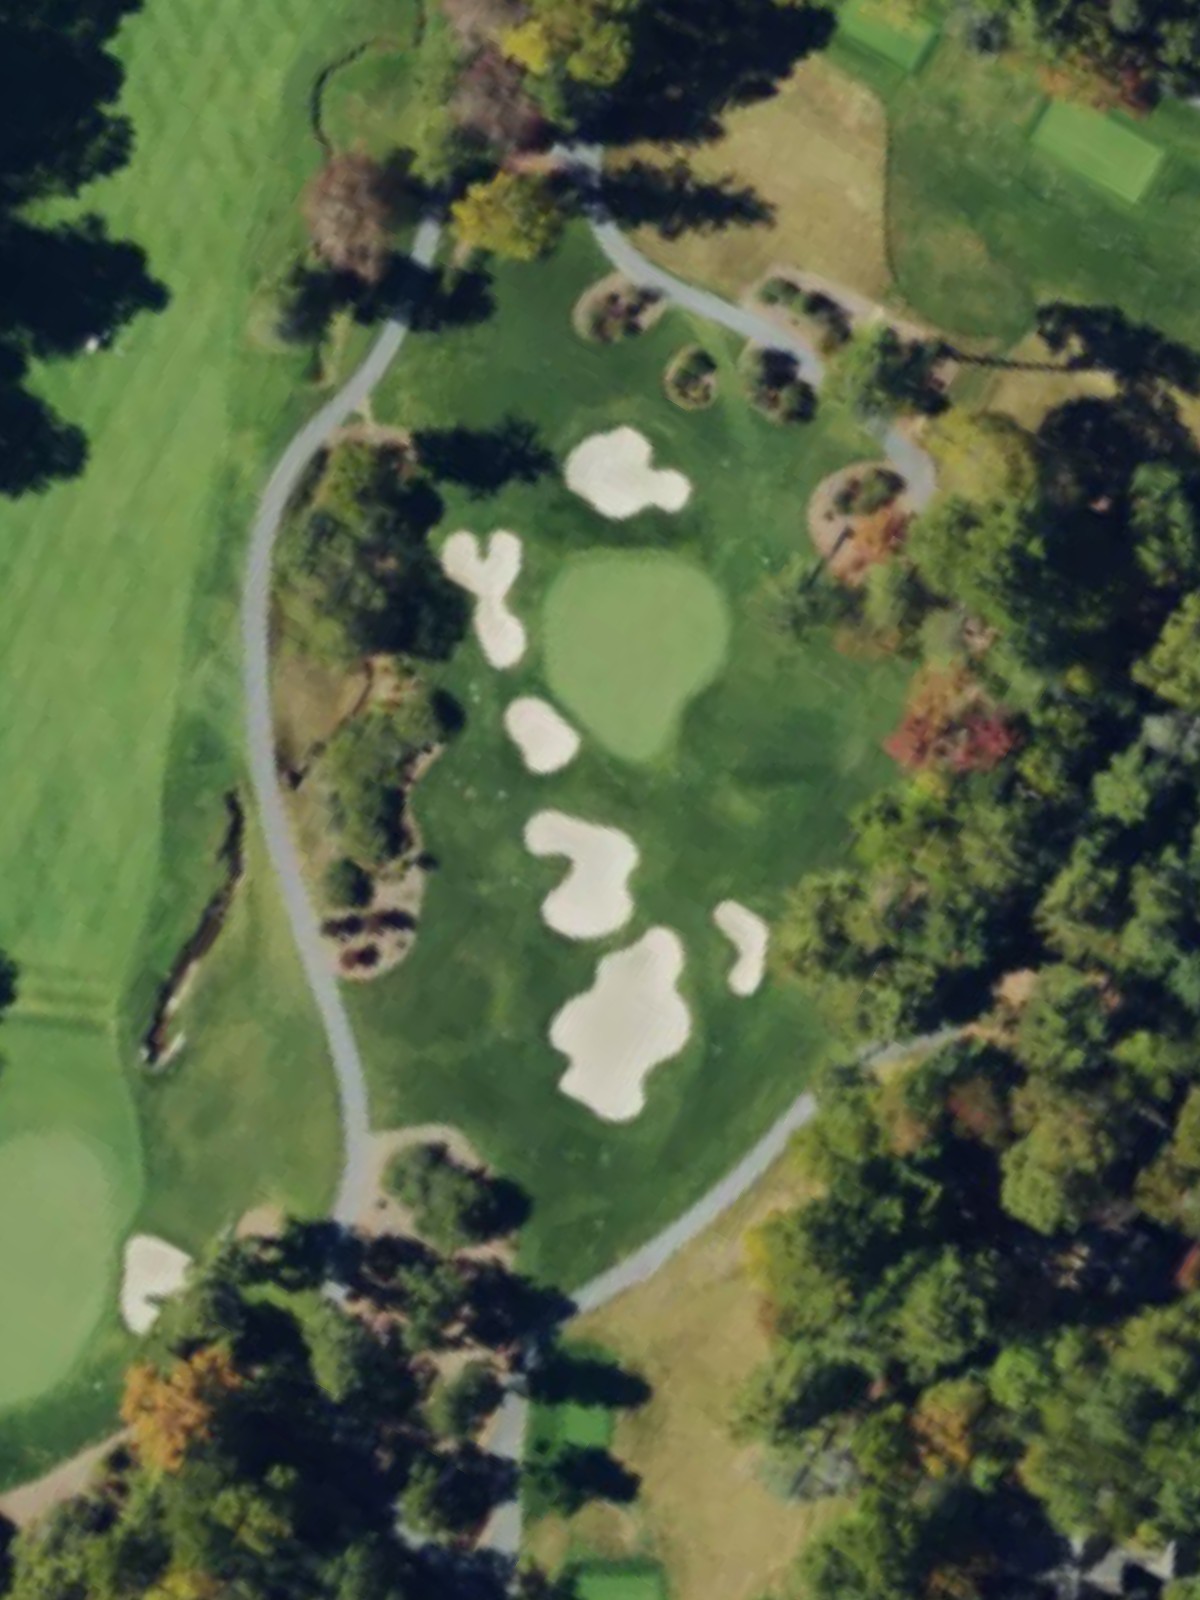
A short par 3 with a narrow green that demands accuracy over distance. Strategic bunkering around the green punishes errant shots, making club selection and execution critical on this relatively short hole.

The most difficult hole on the course, this par 5 features a dramatic dogleg or significant hazard placement that complicates the path to the green. Multiple strategic decisions and hazards throughout make this a true test of all-around golfing skill.

A strong par 4 that plays longer than its yardage suggests, with water or out-of-bounds likely threatening at least one side. The approach to the green is particularly challenging, with hazards guarding the scoring area.

A short par 3 with minimal hazard interference, offering a scoring opportunity early on the back nine. The straightforward nature of this hole provides relief between more demanding stretches.

A mid-length par 4 with a relatively clean fairway corridor that narrows slightly toward the green. Bunkers frame the green's approaches, and the hole's position suggests a strategic design rather than brute difficulty.

A par 4 of moderate length with a fairly open fairway allowing players to establish good position for the approach shot. Greenside bunkers provide the primary defense, making the short game critical to scoring.

A solid par 4 that plays moderately long and requires strategic positioning off the tee to set up an effective approach. Hazards likely tighten near the green, demanding accurate long-iron or short wood play into the scoring area.

A par 5 with birdie potential for players who navigate its layout and hazards successfully. Water or out-of-bounds likely affects routing around the hole, and the green's depth rewards both aggressive and conservative approaches.
The most difficult par 3 on the course, this longer one-shotter demands a full swing to a well-protected green. Hazards and bunkers surround the target, requiring precise execution from tee to green.

A short par 4 that offers scoring opportunity through accurate driving and disciplined approach play. The abbreviated yardage does not guarantee ease—strategic bunkering and green complexity demand respect.
A par 4 of moderate length with a fair landing area off the tee that may narrow as it approaches the green. Hazards protect the approach, and the hole's mid-course position suggests solid resistance rather than extreme difficulty.

A par 4 with a relatively open fairway that provides decent opportunity for position, though hazards likely tighten around the green. The straightforward layout does not diminish the importance of accurate approach play.
The second most difficult hole on the course, this par 4 presents a formidable challenge despite moderate yardage. Water, out-of-bounds, or strategic bunkering makes both the tee shot and approach highly consequential.

A strong par 4 that plays longer and demands precision from the tee through the approach shot. Hazards likely affect both the driving corridor and the green's entrance, making this a key test late in the round.

A mid-length par 3 with a well-protected green that presents a significant challenge relative to its short distance. Strategic bunkering and hazards punish imprecise execution, making this a pivotal scoring hole.

The closing par 5 offers a dramatic finish with strategic hazards and bunkering influencing the entire hole's routing. The green's accessibility and the hole's length combine to create varied challenge levels depending on approach choice.
Scorecard
| Hole | 1 | 2 | 3 | 4 | 5 | 6 | 7 | 8 | 9 | Out | 10 | 11 | 12 | 13 | 14 | 15 | 16 | 17 | 18 | In | Tot |
|---|---|---|---|---|---|---|---|---|---|---|---|---|---|---|---|---|---|---|---|---|---|
| Par | 5 | 4 | 3 | 5 | 4 | 3 | 4 | 4 | 4 | 36 | 5 | 3 | 4 | 4 | 4 | 4 | 4 | 3 | 5 | 36 | 72 |
| HCP | 7 | 5 | 15 | 1 | 3 | 17 | 13 | 11 | 9 | 6 | 18 | 14 | 10 | 12 | 2 | 4 | 16 | 8 | |||
| fazio tees | 546 | 484 | 241 | 584 | 455 | 156 | 404 | 401 | 465 | 3736 | 558 | 182 | 322 | 446 | 406 | 427 | 483 | 230 | 557 | 3611 | 7347 |
| mckee tees | 540 | 415 | 196 | 565 | 383 | 151 | 366 | 382 | 418 | 3416 | 543 | 166 | 317 | 411 | 400 | 409 | 447 | 218 | 533 | 3444 | 6860 |
| tournament tees | 540 | 380 | 176 | 565 | 383 | 151 | 366 | 359 | 379 | 3299 | 543 | 166 | 317 | 411 | 400 | 389 | 412 | 165 | 473 | 3276 | 6575 |
| wade hampton tees | 529 | 380 | 176 | 535 | 361 | 140 | 333 | 359 | 379 | 3192 | 528 | 148 | 289 | 391 | 383 | 389 | 412 | 165 | 473 | 3178 | 6370 |
| senior tourney tees | 529 | 344 | 167 | 514 | 317 | 140 | 333 | 327 | 336 | 3007 | 528 | 148 | 289 | 374 | 343 | 287 | 377 | 165 | 473 | 2984 | 5991 |
| founders tees | 518 | 344 | 167 | 514 | 317 | 126 | 315 | 327 | 336 | 2964 | 497 | 130 | 282 | 374 | 343 | 287 | 377 | 135 | 417 | 2842 | 5806 |
| super senior tees | 443 | 344 | 117 | 440 | 317 | 126 | 315 | 259 | 286 | 2647 | 448 | 130 | 282 | 374 | 311 | 244 | 285 | 100 | 417 | 2591 | 5238 |
| chimney top tees | 443 | 300 | 117 | 440 | 257 | 109 | 252 | 259 | 286 | 2463 | 448 | 101 | 228 | 349 | 311 | 244 | 285 | 100 | 385 | 2451 | 4914 |