The Falls is an 18-hole golf course in Larchwood, IA with a par of 72. It offers 5 tee sets: black (7,110 yards, slope 132, rating 74.8), gold (6,760 yards, slope 129, rating 73.1), white (6,400 yards, slope 127, rating 71.5), blue (5,710 yards, slope 120, rating 67.9), silver (5,205 yards, slope 112, rating 65.5). The hardest hole is #4, a par 4 playing 355 yards from the first tee.
The Falls
Larchwood, IA
Get PDF Yardage Book
We'll email you the PDF link. No spam, ever.
Create Your Game Plan
Pick your tees, enter your bag, and get a personalized shot-by-shot strategy for every hole.
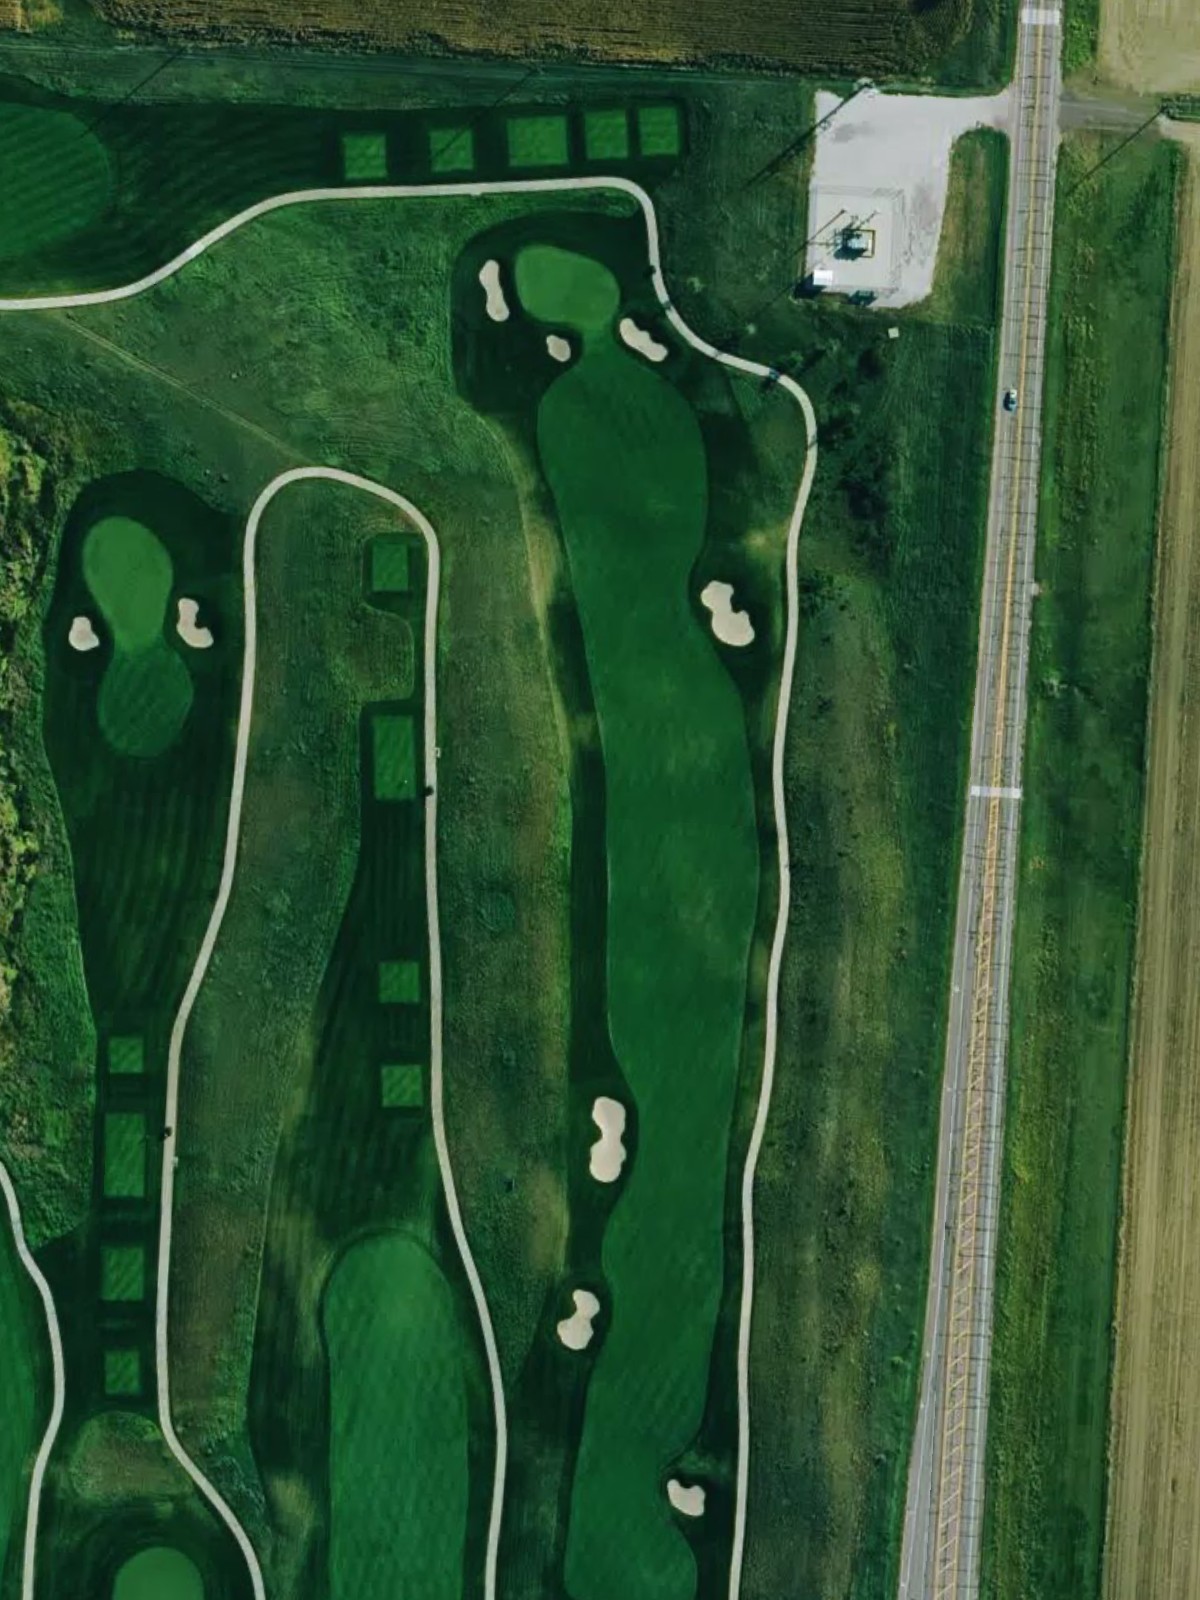
A welcoming opening par 4 with a relatively open fairway that gradually narrows as it approaches the green. Bunkers protect the right side of the putting surface, making accuracy on the approach critical.
A lengthy par 5 that offers birdie opportunity for longer hitters. The fairway is relatively forgiving off the tee, but hazards tighten around the green to protect par.
The course's most difficult par 4, ranking as the #5 handicap hole despite modest length. Tight fairway positioning and strategic green-side bunkering demand precision from tee to green.
The #1 handicap hole, this demanding par 4 features significant length and requires two quality shots to reach the green safely. Water and out-of-bounds left create a premium on tee shot accuracy.
A mid-length par 4 with a relatively open driving area that opens up scoring opportunities. The approach to the green is the defining challenge, with hazards positioned to catch wayward shots.
A short par 3 serving as a welcome reprieve on the front nine. The small green is surrounded by bunkers and rough, making club selection and accuracy essential despite the modest yardage.
A generous par 5 that rewards aggressive play off the tee and a solid second shot. The wide fairway is relatively hazard-free until the approach area, where bunkers and water come into play near the green.
A mid-length par 3 with a well-bunkered green complex that demands a precise tee shot. Hazards surround the putting surface, leaving little room for error.
The #3 handicap hole, this par 4 features length and complexity that test even the strongest players. Strategic hazard placement throughout the hole requires careful positioning on both tee and approach shots.
A shorter par 4 that offers a chance to gain ground, though hazards protect the scoring area. The fairway is relatively open off the tee, but the approach must navigate bunkering or water near the green.
A mid-range par 3 with an elevated green complex that can be difficult to access. Bunkers and rough surround the putting surface, and the undulating terrain adds to the challenge.
A challenging par 4 that ranks as the #6 handicap hole and plays to a strategic length. Water and bunkers are positioned throughout to penalize poor positioning off the tee or on the approach.
A par 5 with adequate length and a relatively open fairway that invites aggressive play. Hazards tighten around the green complex, where precision is required to secure par or birdie.
The course's easiest hole, this short par 4 presents a genuine scoring opportunity despite its straightforward design. The accessible fairway and green make this a welcome birdie chance late in the round.
The #2 handicap hole, this par 4 features both length and complexity that demand near-perfect execution. Strategic hazards left and right create a narrow corridor to the green, making this one of the course's stiffest tests.
A challenging par 4 ranking as the #4 handicap hole with significant length and tactical bunkering. The fairway narrows as it approaches the green, which is well-defended by hazards on both sides.
A long par 5 that demands two quality shots to set up a reasonable approach. Water hazards and bunkers are strategically placed to challenge both aggressive and conservative play throughout the hole.

A picturesque closing par 3 that finishes the round with drama and beauty. The small green is surrounded by hazards, and the elevated tee shot to the water-framed putting surface provides a memorable final test.
Scorecard
| Hole | 1 | 2 | 3 | 4 | 5 | 6 | 7 | 8 | 9 | Out | 10 | 11 | 12 | 13 | 14 | 15 | 16 | 17 | 18 | In | Tot |
|---|---|---|---|---|---|---|---|---|---|---|---|---|---|---|---|---|---|---|---|---|---|
| Par | 4 | 5 | 4 | 4 | 4 | 3 | 5 | 3 | 4 | 36 | 4 | 3 | 4 | 5 | 4 | 4 | 4 | 5 | 3 | 36 | 72 |
| HCP | 13 | 9 | 5 | 1 | 7 | 17 | 15 | 11 | 3 | 8 | 10 | 6 | 14 | 18 | 2 | 4 | 12 | 16 | |||
| black | 350 | 560 | 365 | 465 | 435 | 145 | 545 | 190 | 430 | 3485 | 410 | 230 | 480 | 525 | 355 | 425 | 475 | 560 | 165 | 3625 | 7110 |
| gold | 340 | 540 | 355 | 445 | 415 | 135 | 515 | 175 | 420 | 3340 | 395 | 200 | 440 | 505 | 340 | 405 | 455 | 530 | 150 | 3420 | 6760 |
| white | 320 | 525 | 340 | 430 | 390 | 125 | 490 | 165 | 400 | 3185 | 365 | 170 | 430 | 480 | 320 | 380 | 425 | 505 | 140 | 3215 | 6400 |
| blue | 295 | 465 | 315 | 355 | 340 | 105 | 455 | 145 | 360 | 2835 | 320 | 155 | 370 | 465 | 285 | 335 | 360 | 475 | 110 | 2875 | 5710 |
| silver | 265 | 415 | 290 | 335 | 310 | 90 | 425 | 130 | 325 | 2585 | 295 | 135 | 340 | 425 | 270 | 300 | 345 | 420 | 90 | 2620 | 5205 |