Poston Butte Golf Club is an 18-hole golf course in Florence, AZ with a par of 72. It offers 10 tee sets: gold (7,282 yards, slope 127, rating 73.8), black (6,820 yards, slope 123, rating 71.8), black/white (6,581 yards, slope 121, rating 70.5), white (6,321 yards, slope 119, rating 69.2), white/red (6,066 yards, slope 117, rating 68.1), mc combo white/red (6,050 yards, slope 117, rating 67.9), red (5,803 yards, slope 113, rating 67.1), mc combo red/green (5,560 yards, slope 111, rating 65.6), red/green (5,532 yards, slope 111, rating 65.8), green (5,303 yards, slope 108, rating 64.7). The hardest hole is #2, a par 4 playing 399 yards from the first tee.
Poston Butte Golf Club
Florence, AZ
Get PDF Yardage Book
We'll email you the PDF link. No spam, ever.
Create Your Game Plan
Pick your tees, enter your bag, and get a personalized shot-by-shot strategy for every hole.
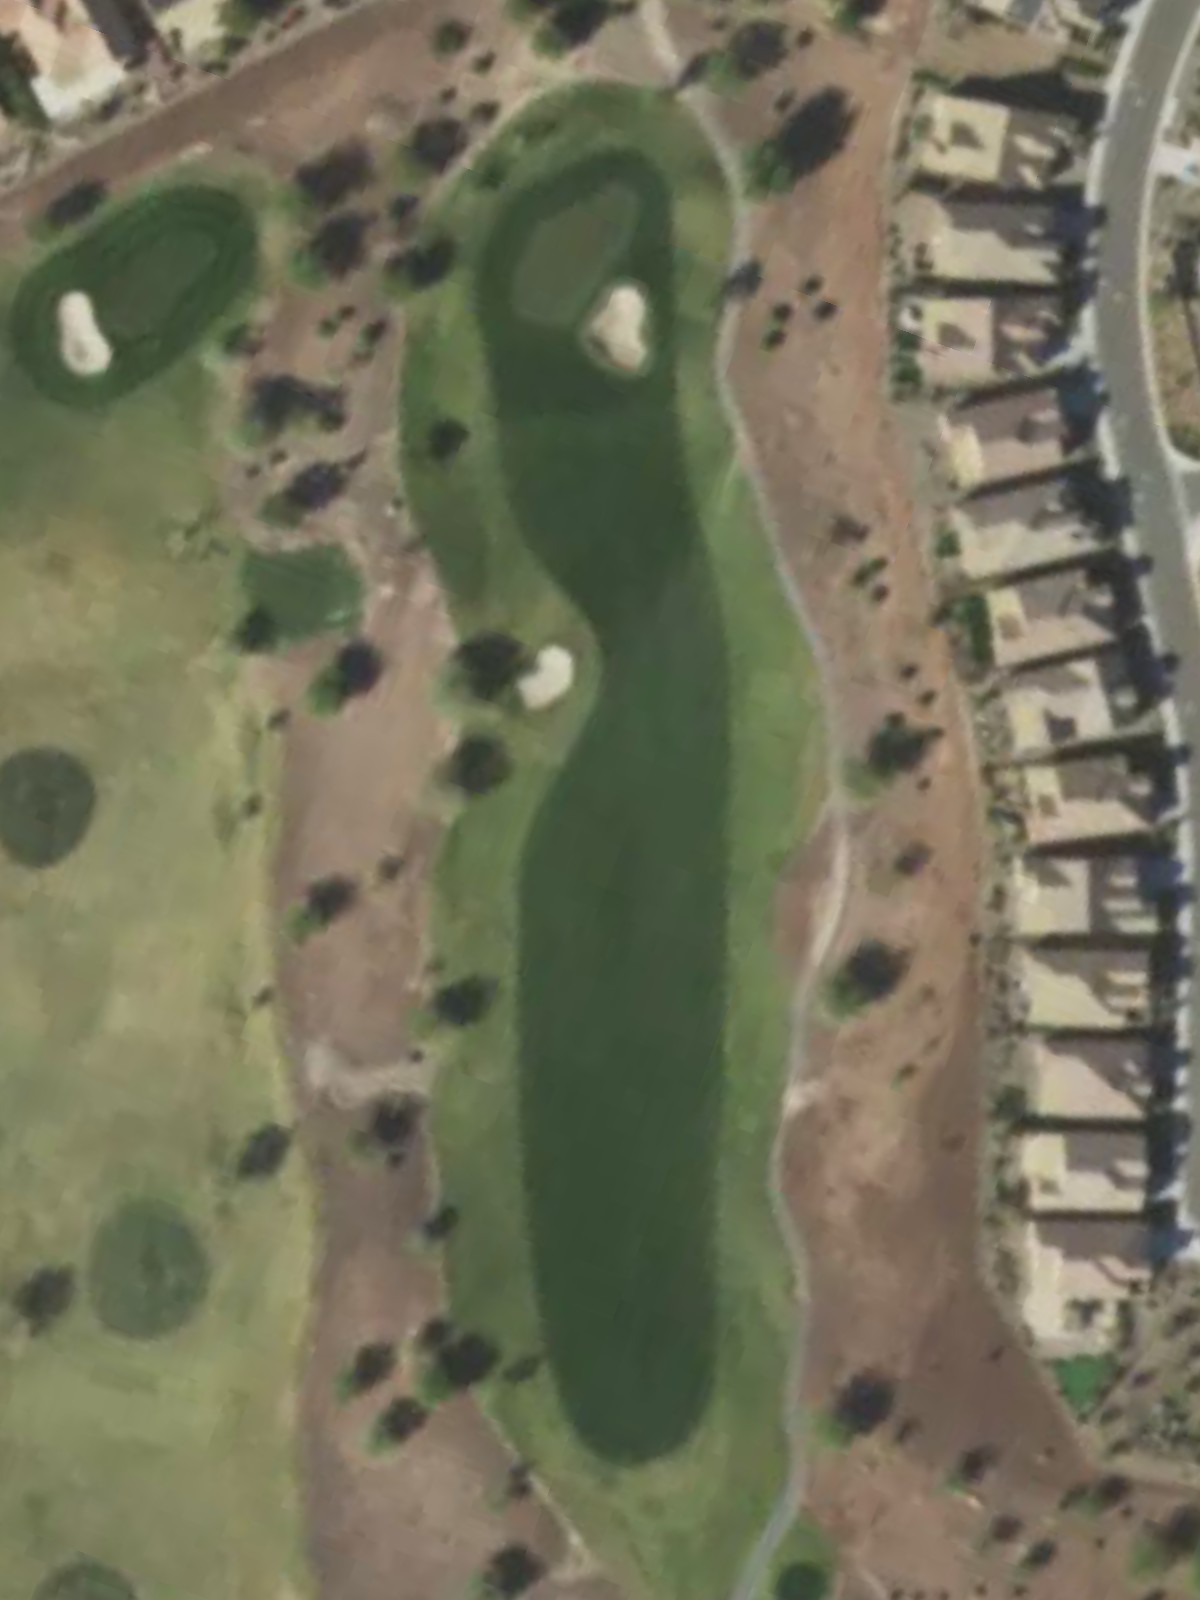
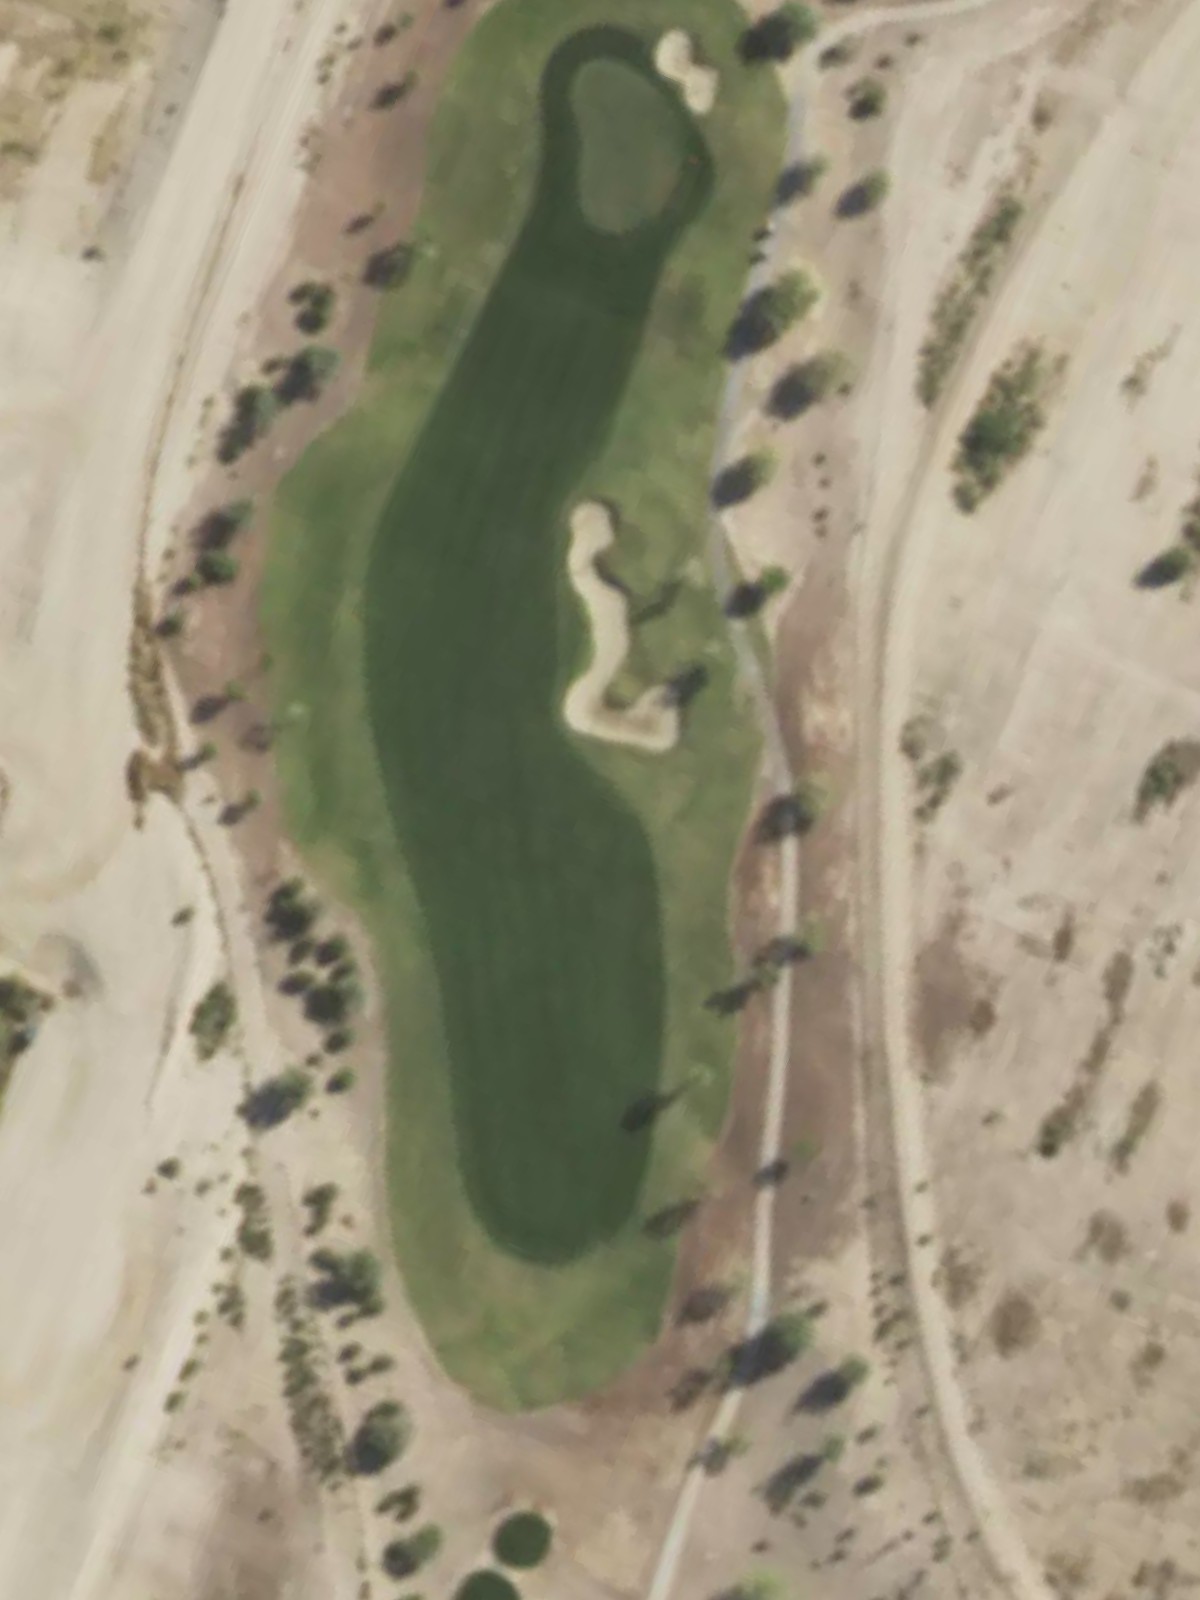
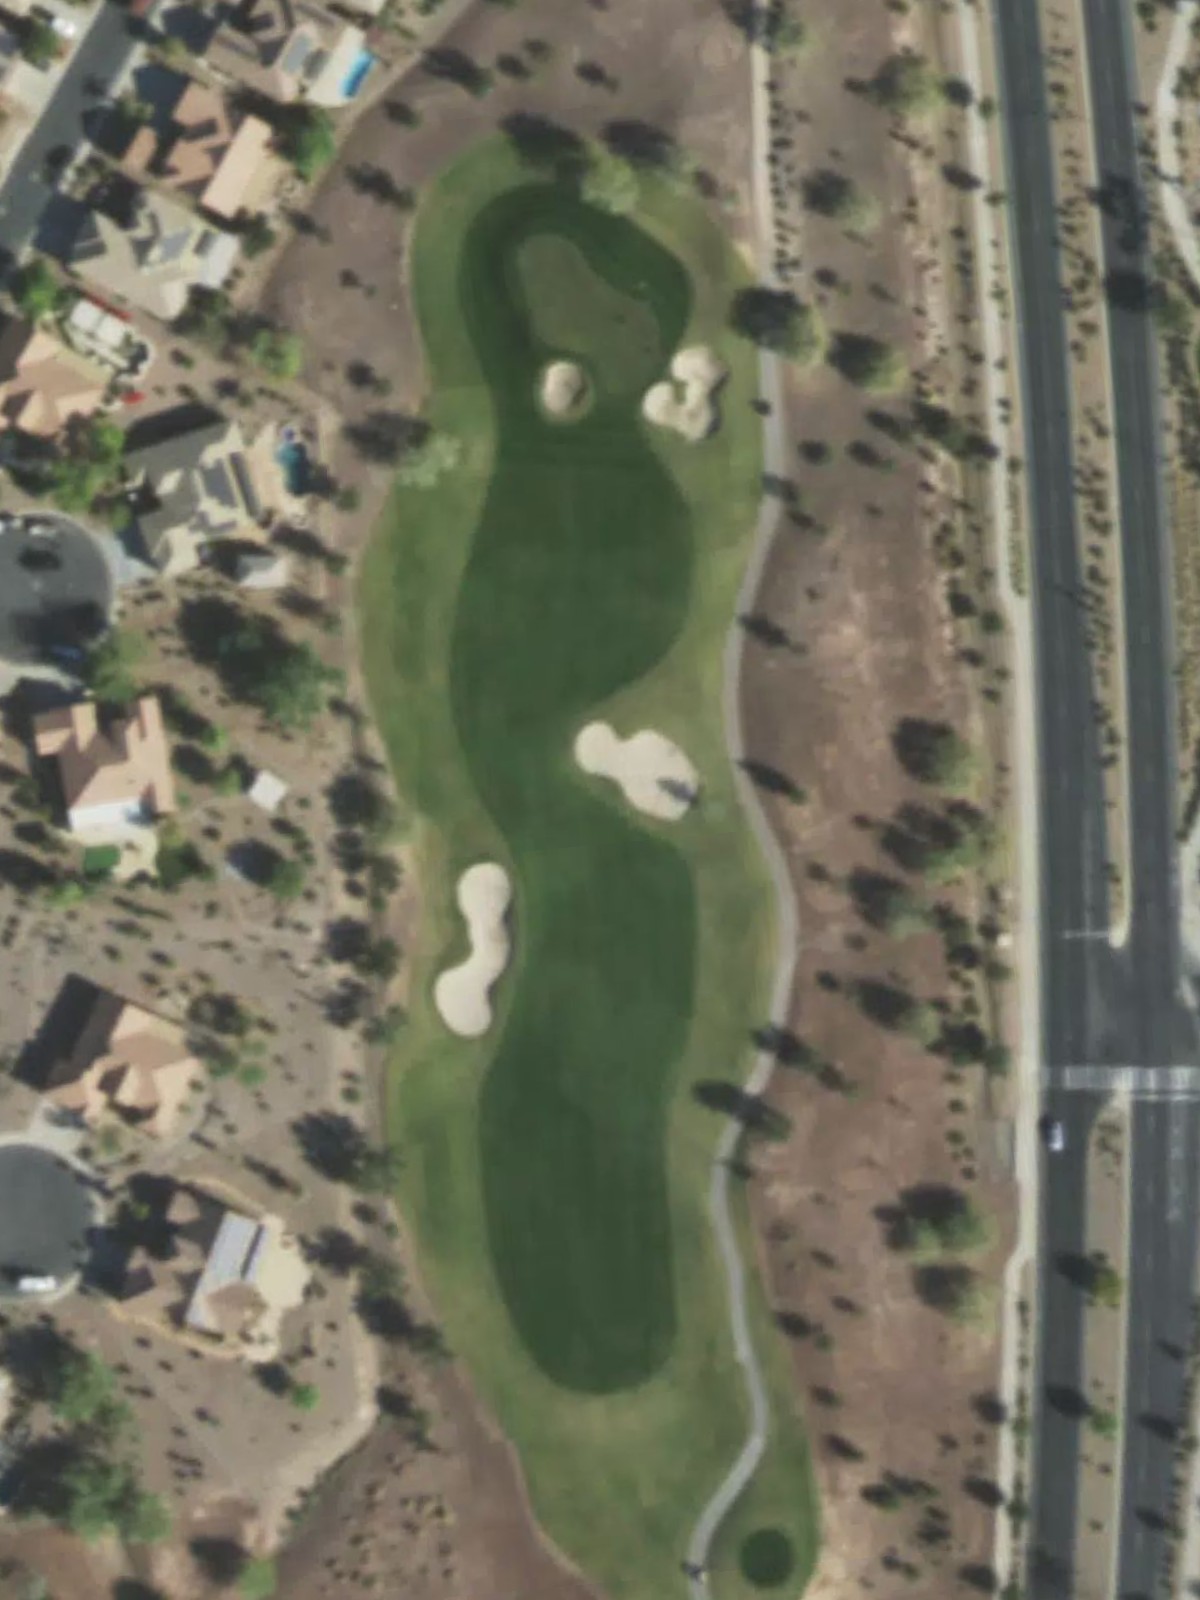
A short par 4 that plays straightaway with a fairway that narrows as it approaches the green. Greenside bunkers on the right side of the green require accuracy on the approach shot, while the relatively modest length makes this an inviting opening hole.
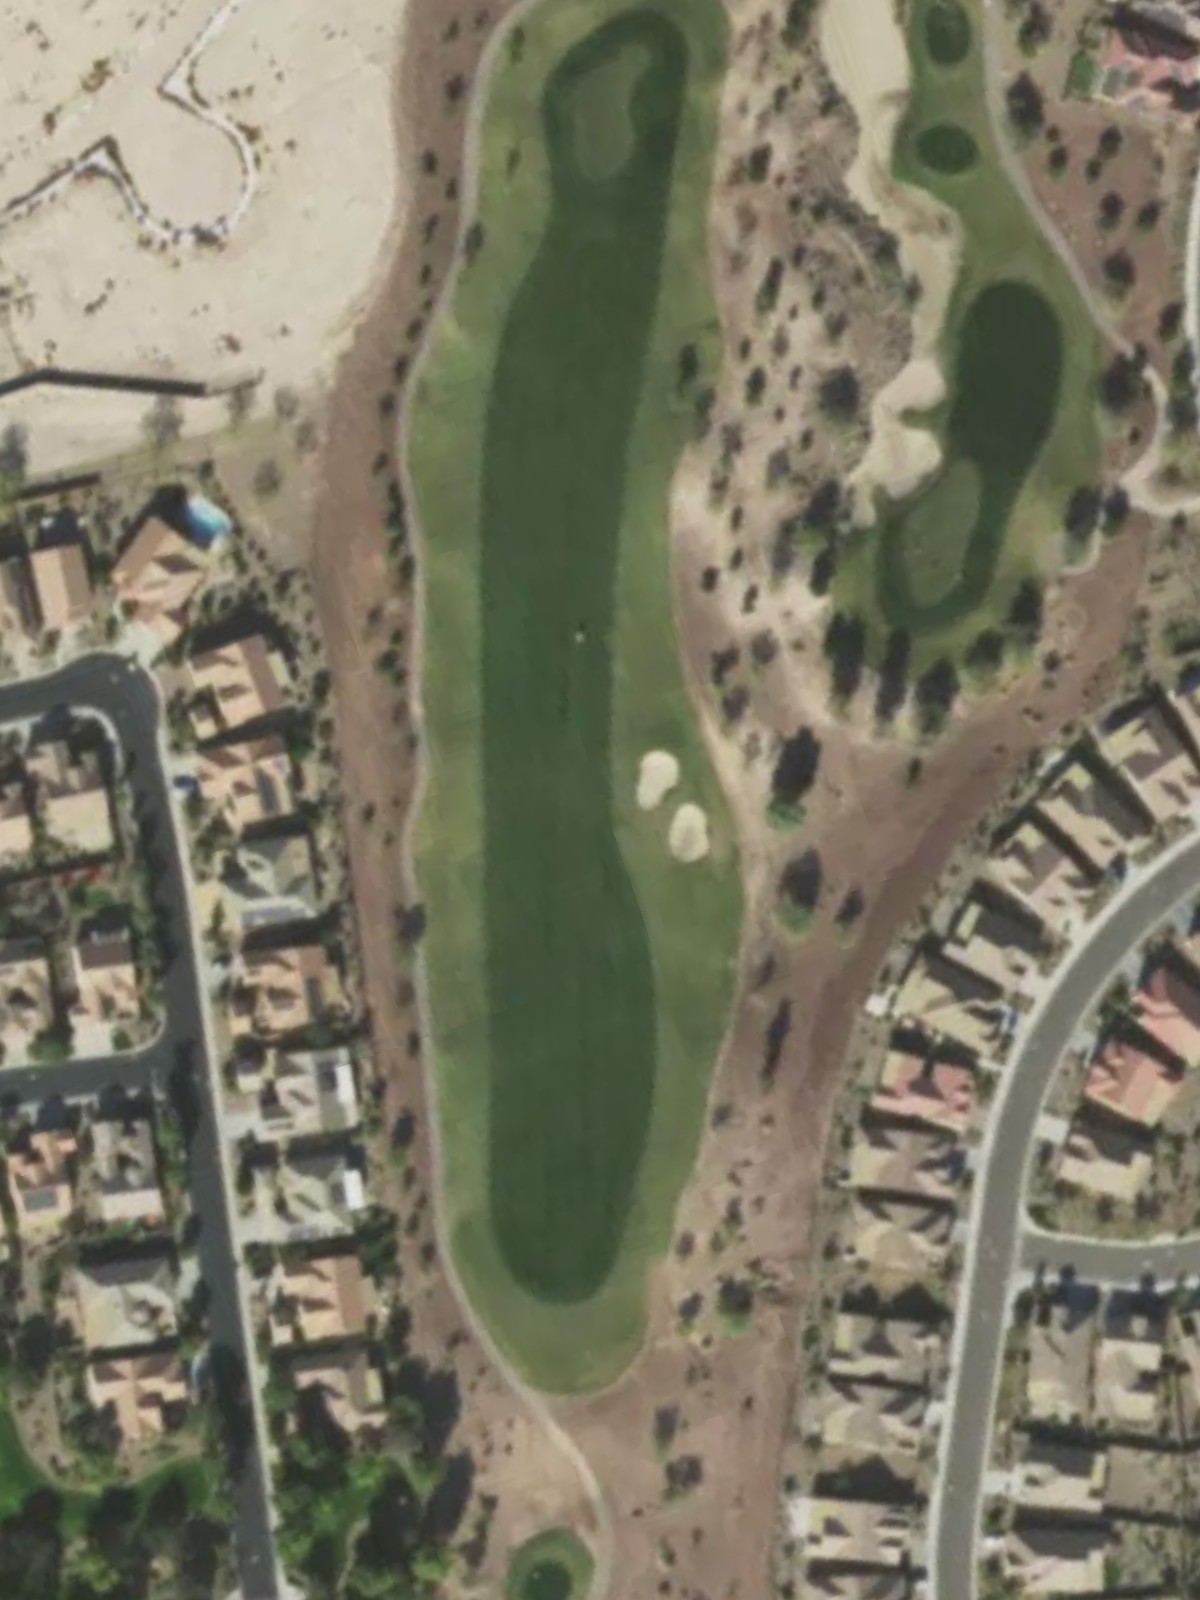
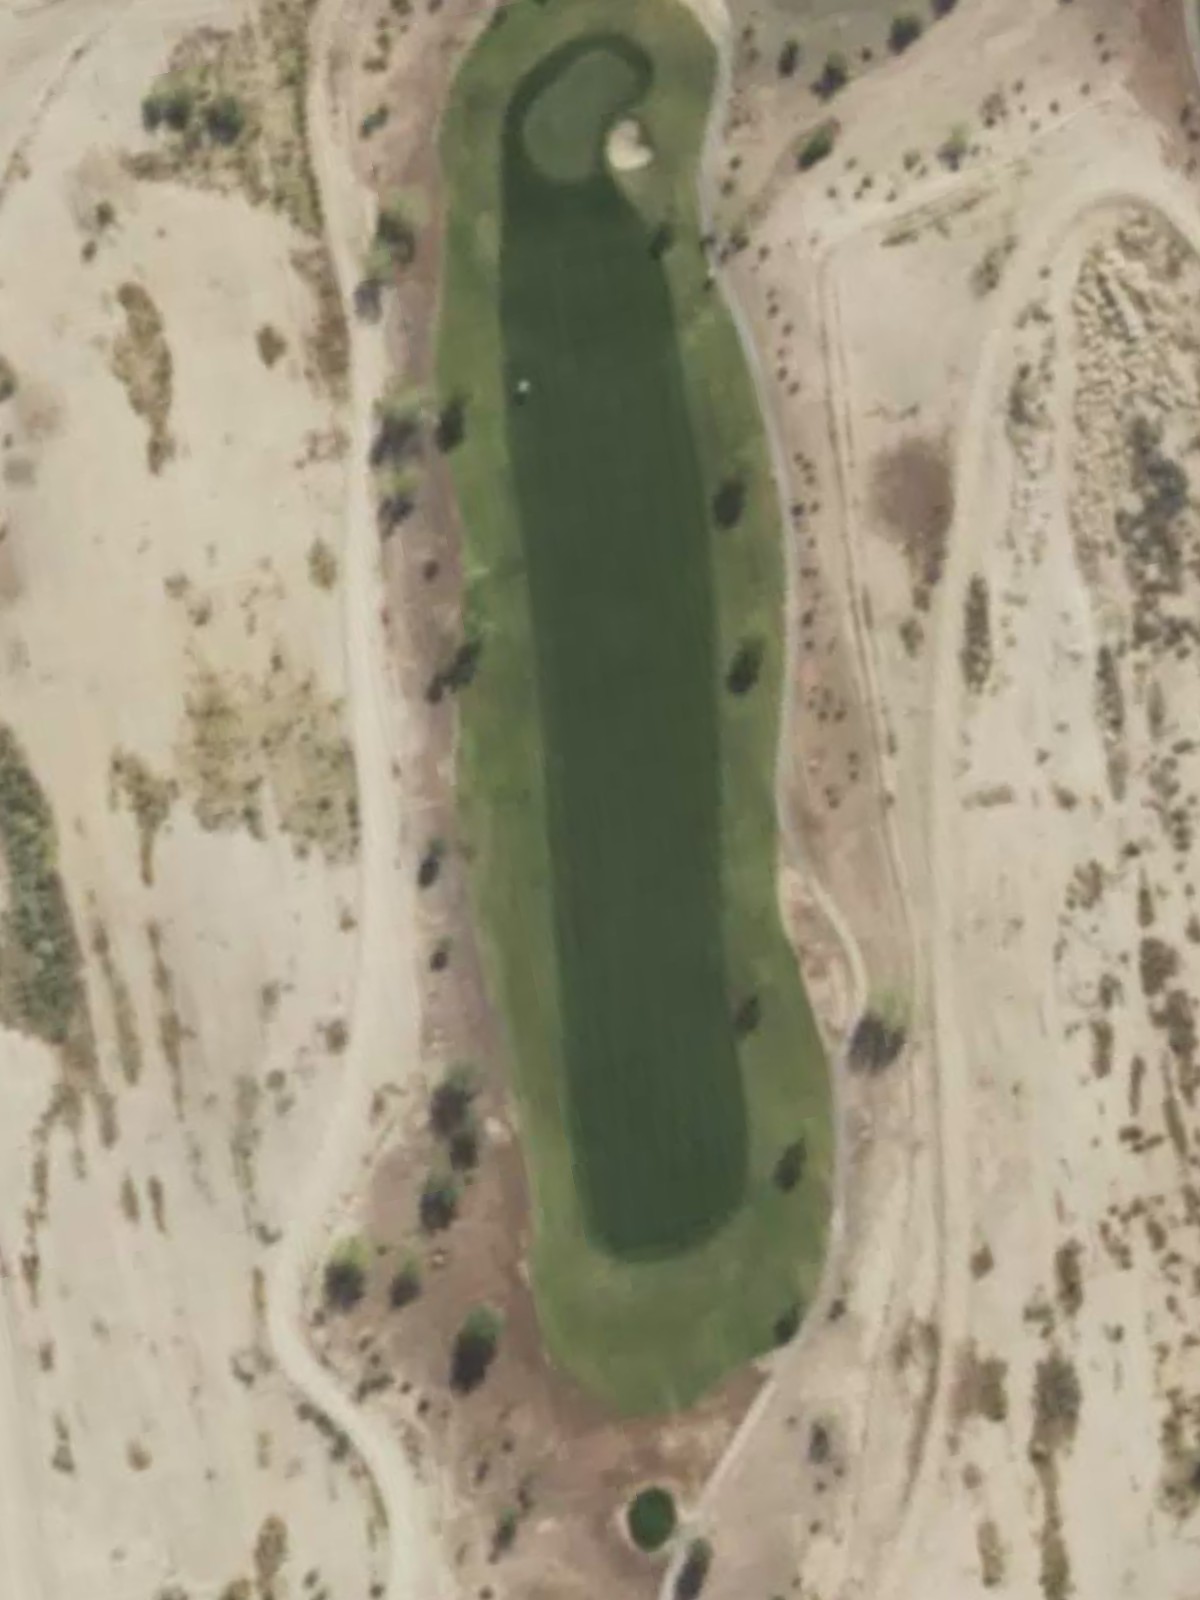
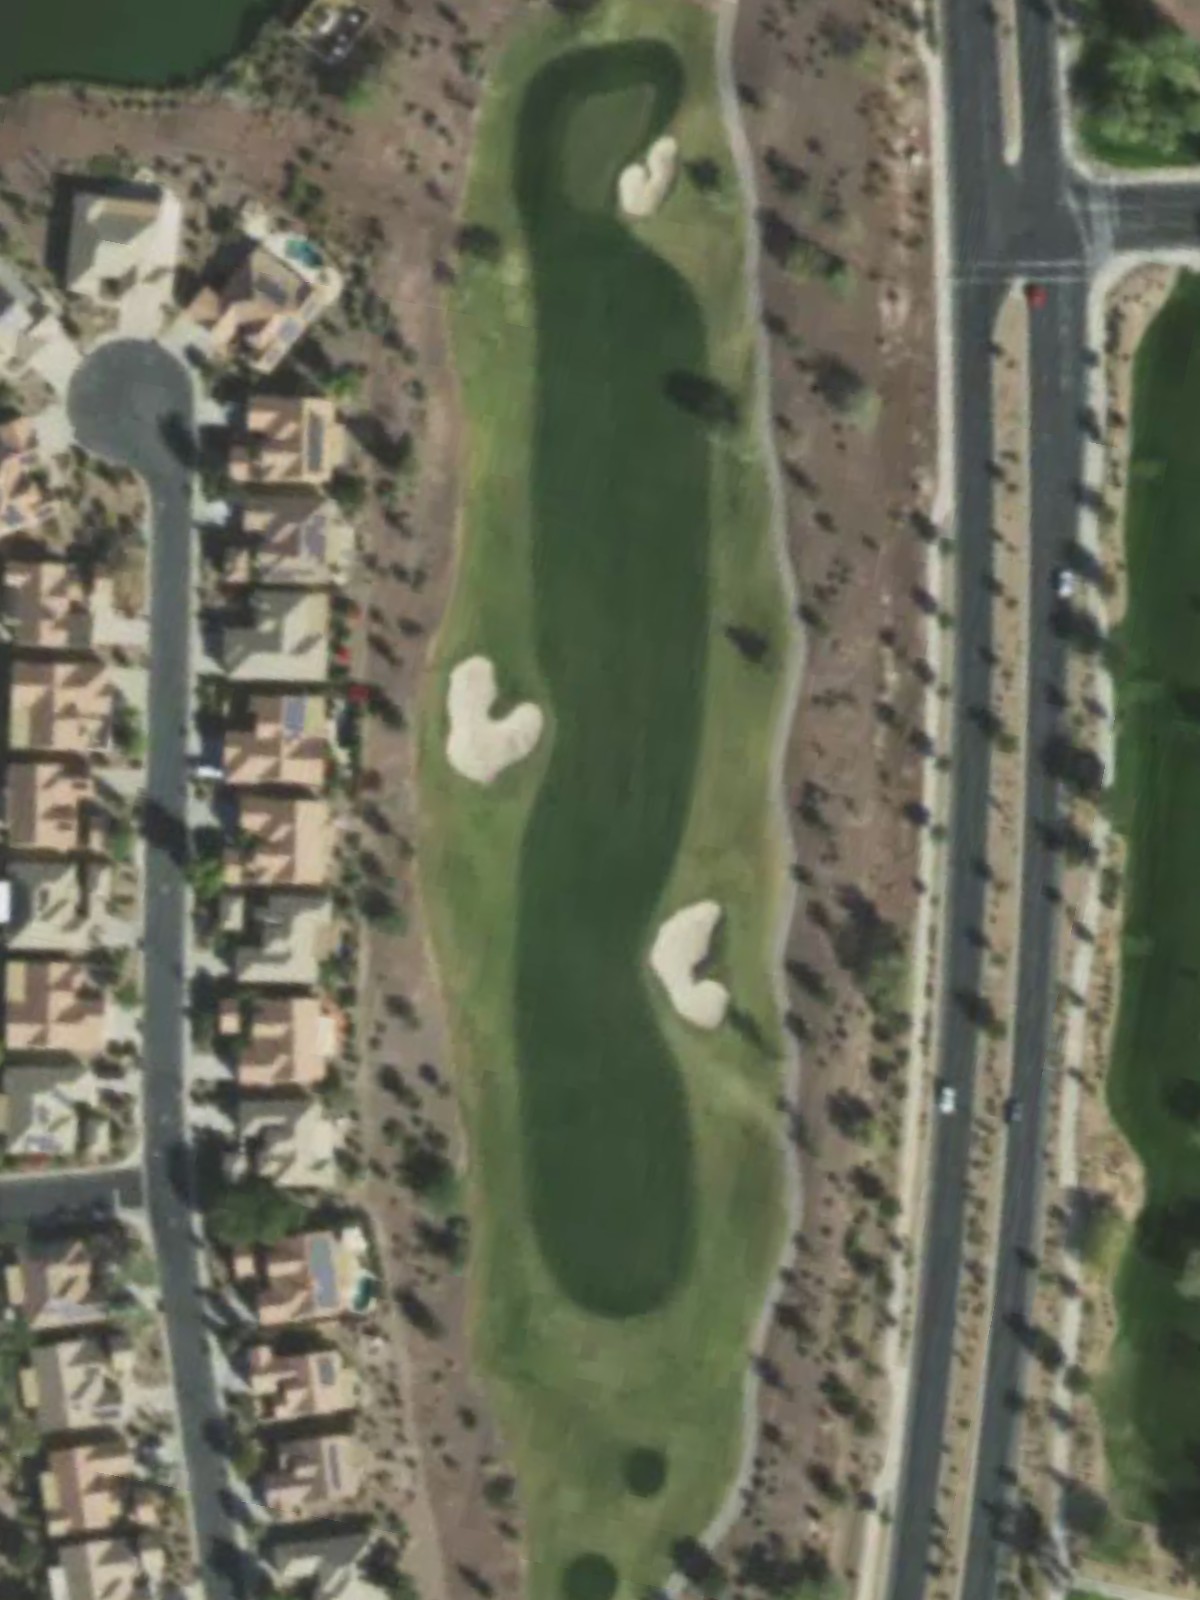
The #1 handicap hole stretches as a demanding par 4 with length as its primary challenge. Strategic bunkering and a well-guarded green demand two solid shots to reach the scorecard, making this one of the course's most difficult tests.
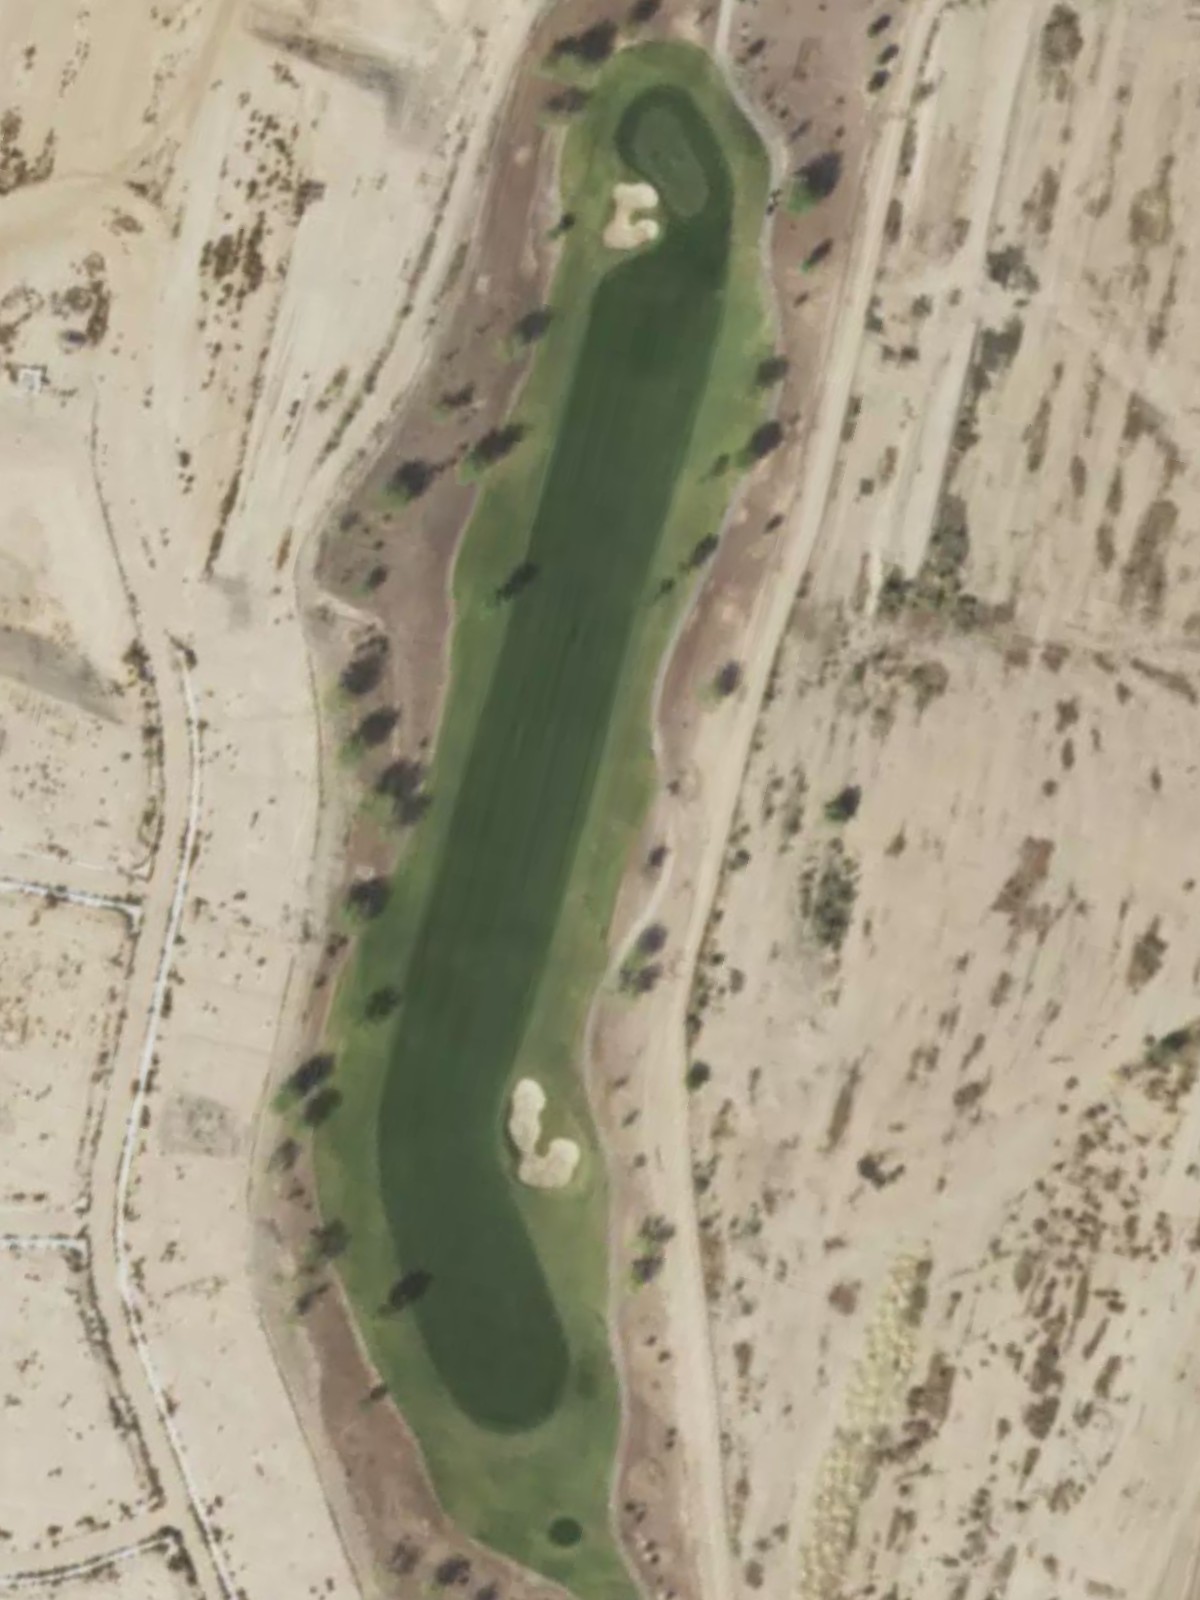
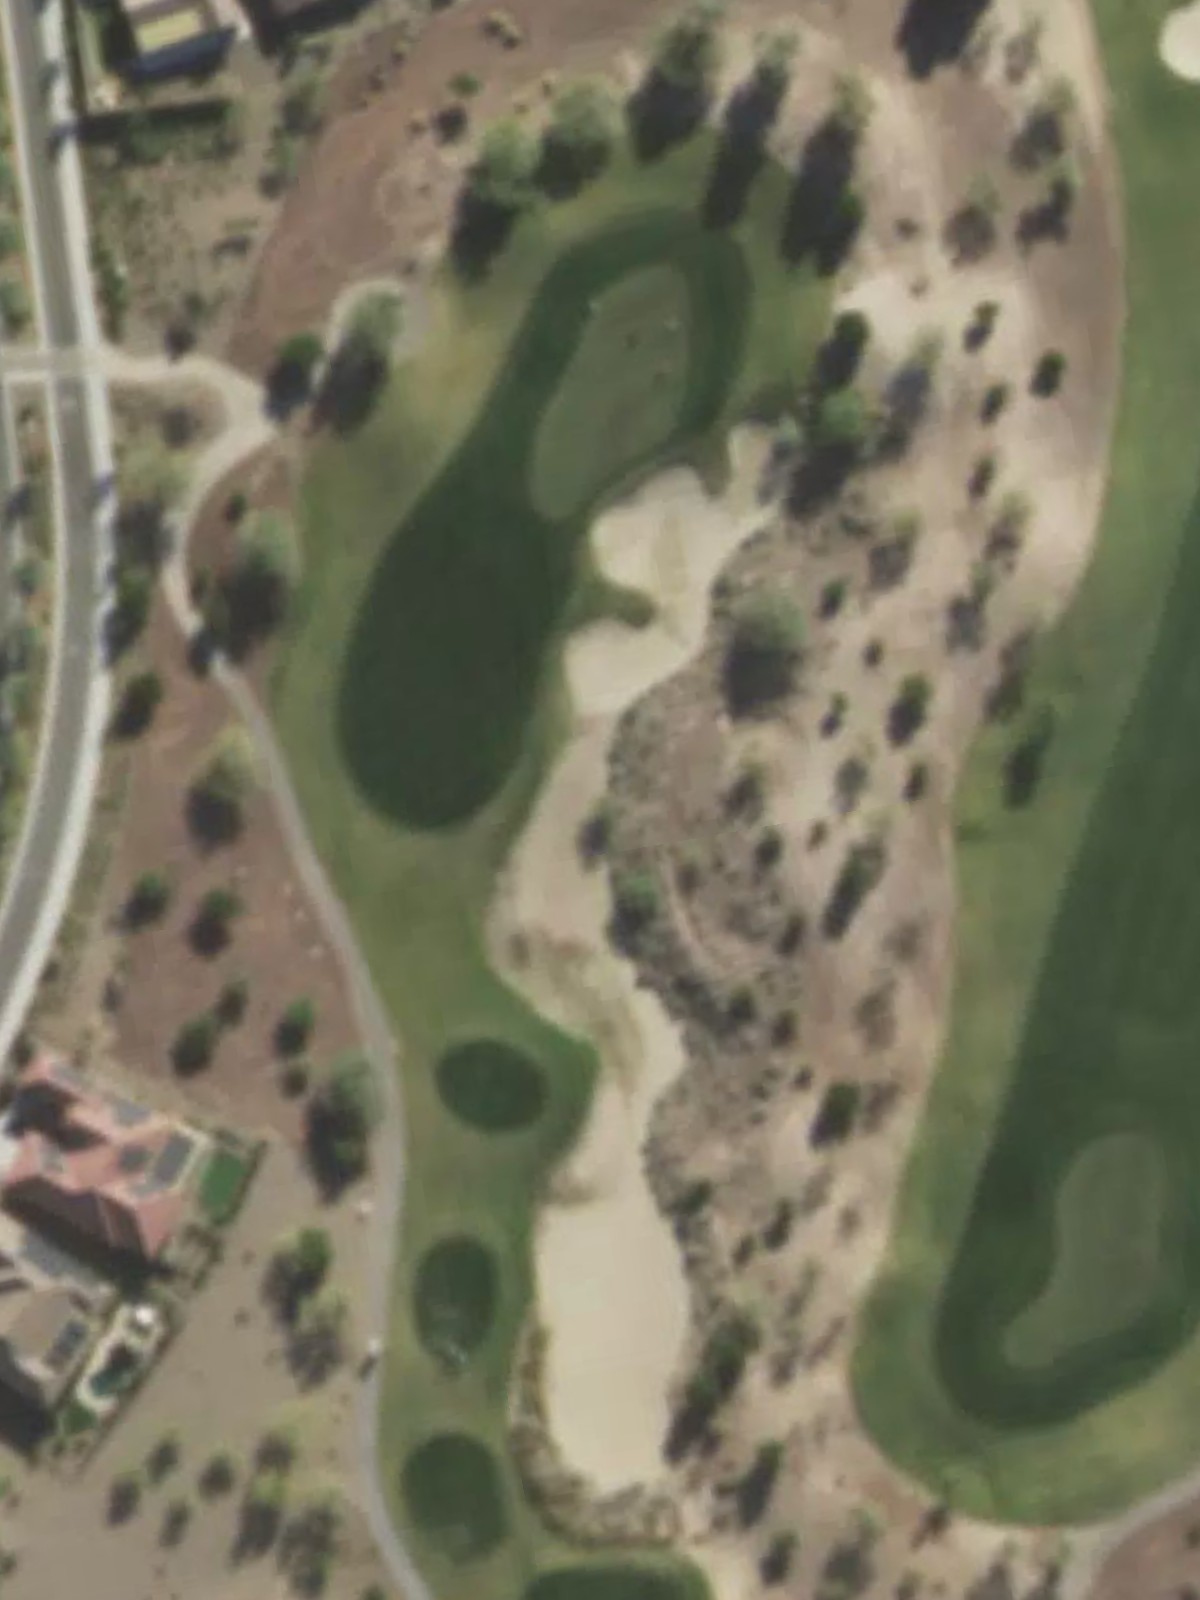
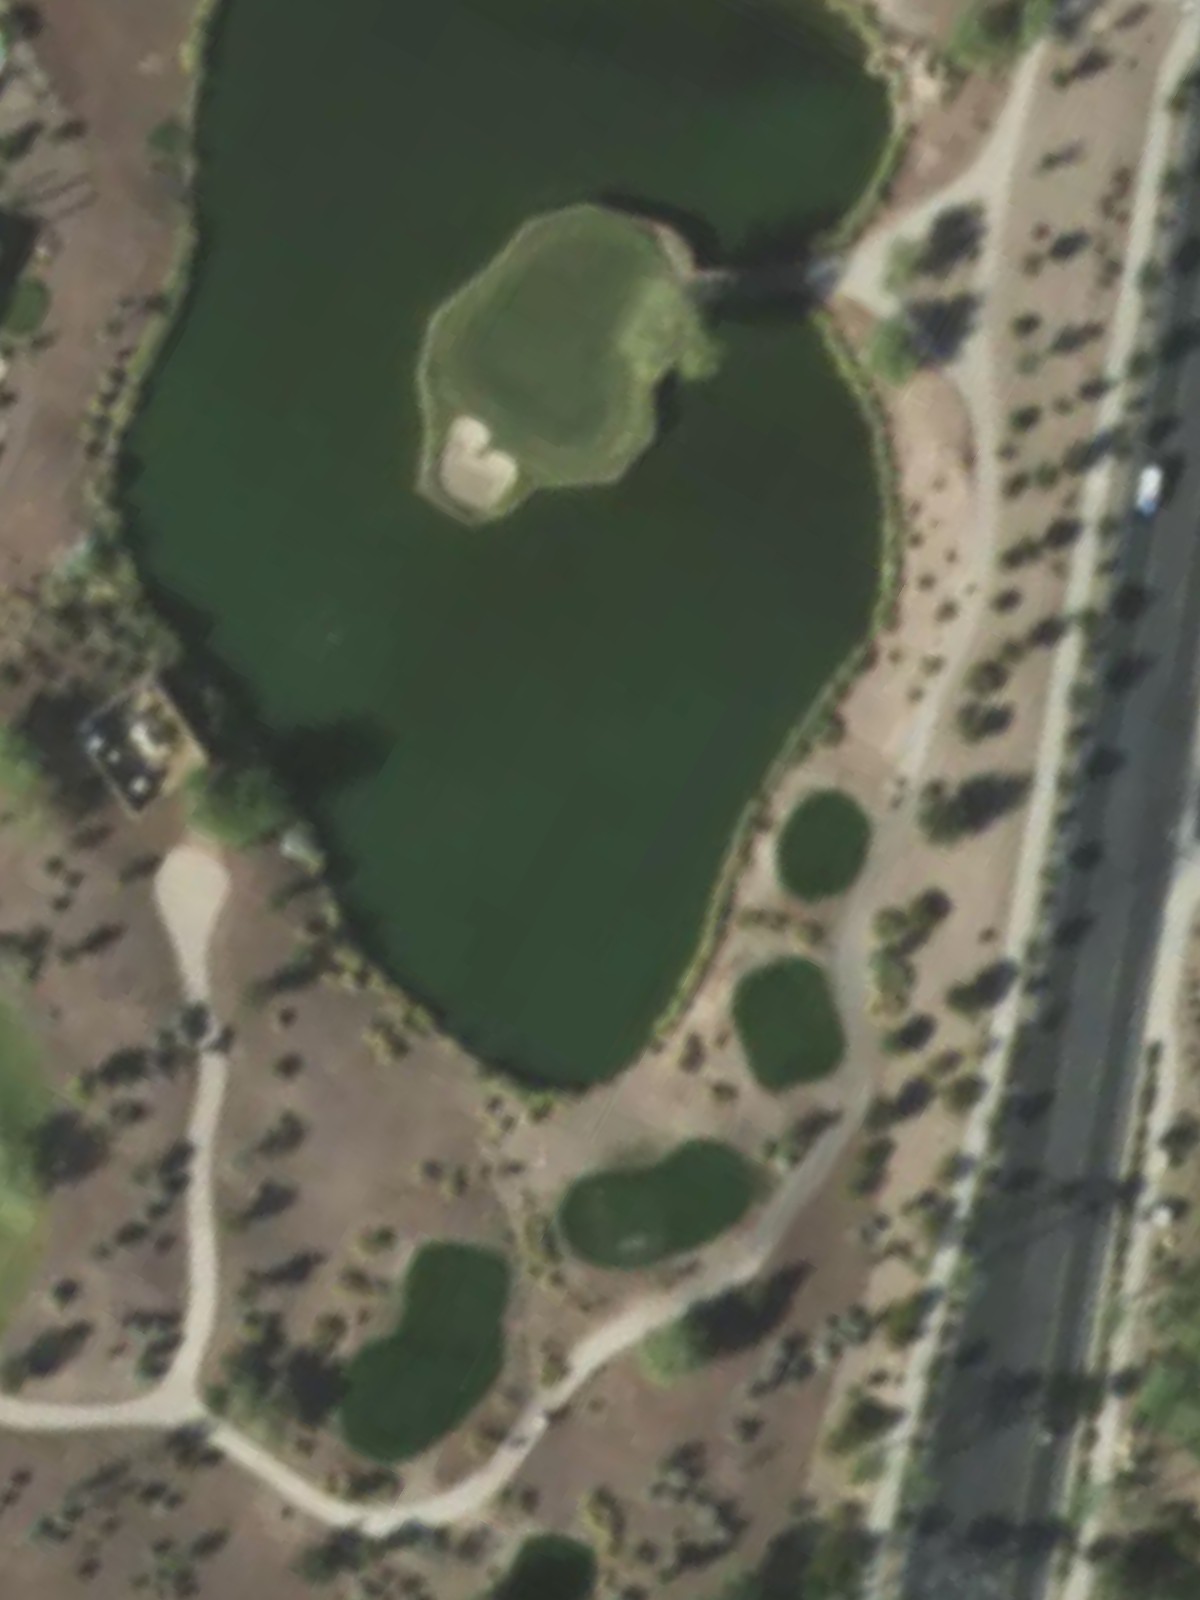
A three-shot par 5 that offers birdie opportunity for longer hitters while remaining accessible from shorter tees. The hole's length and green complex demand careful positioning, with hazards strategically placed to penalize errant approaches.
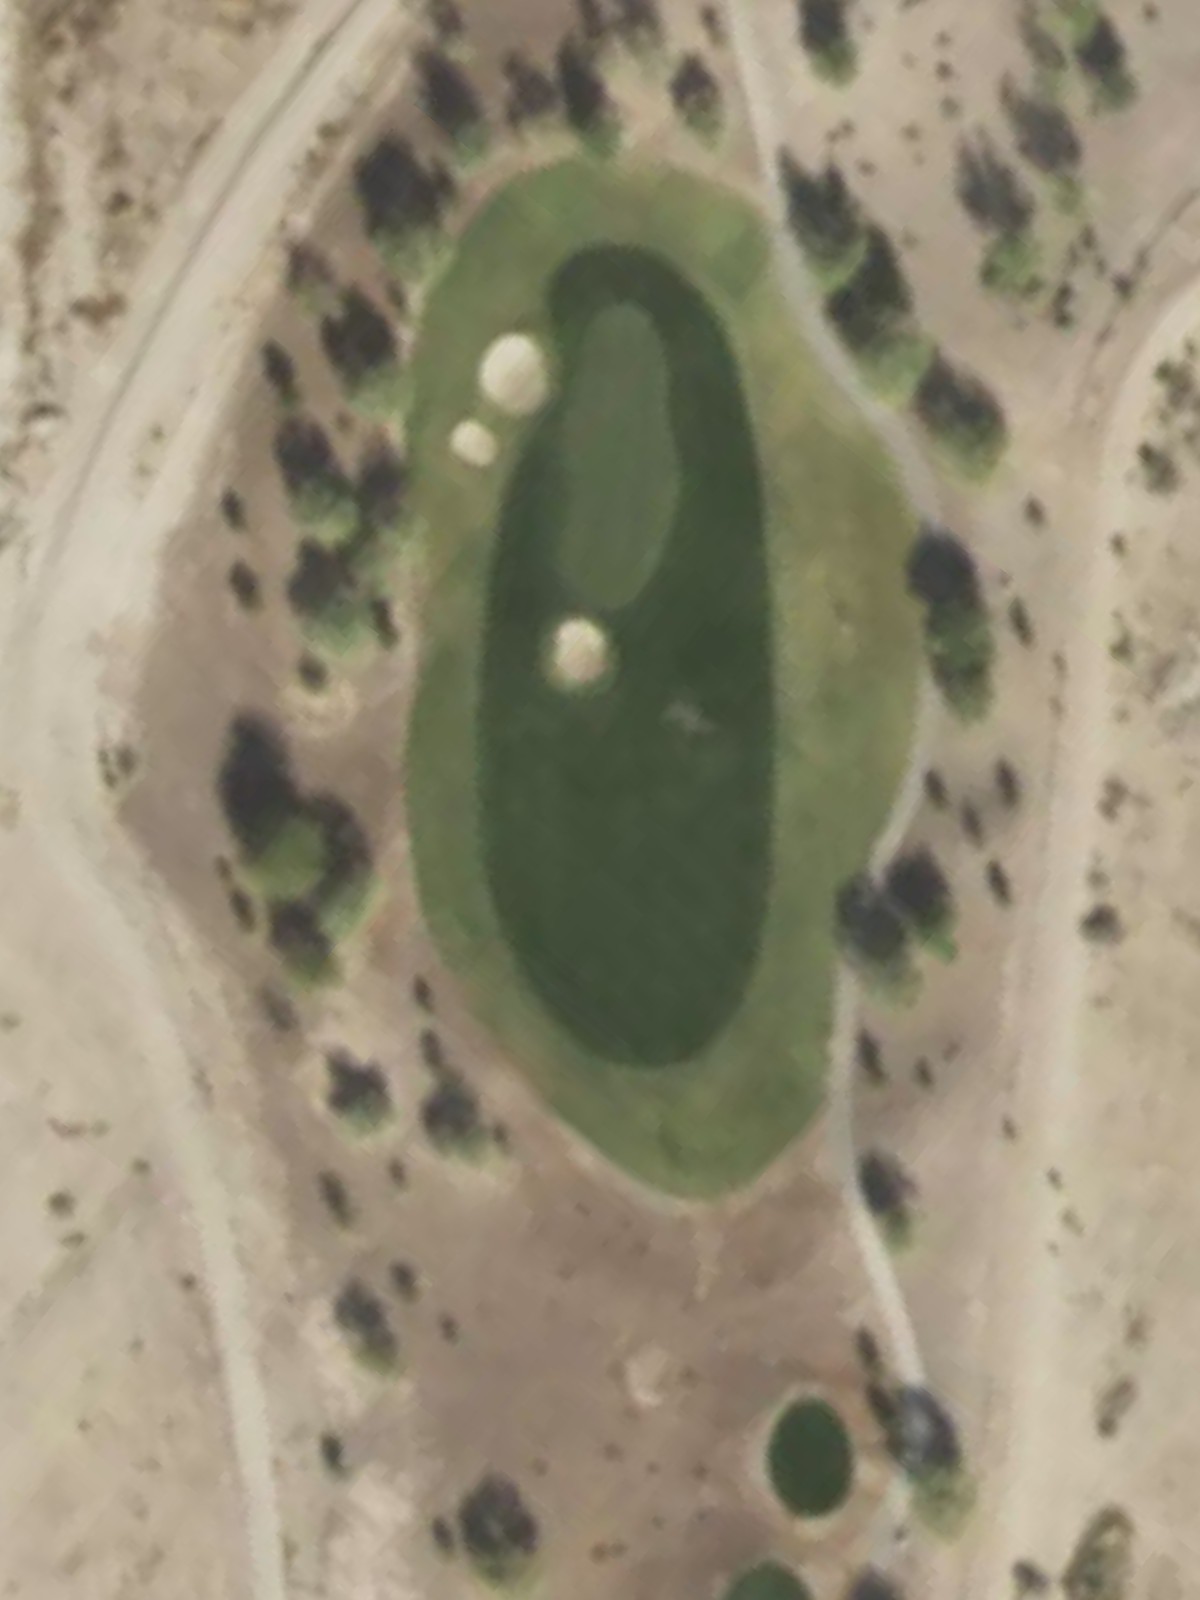
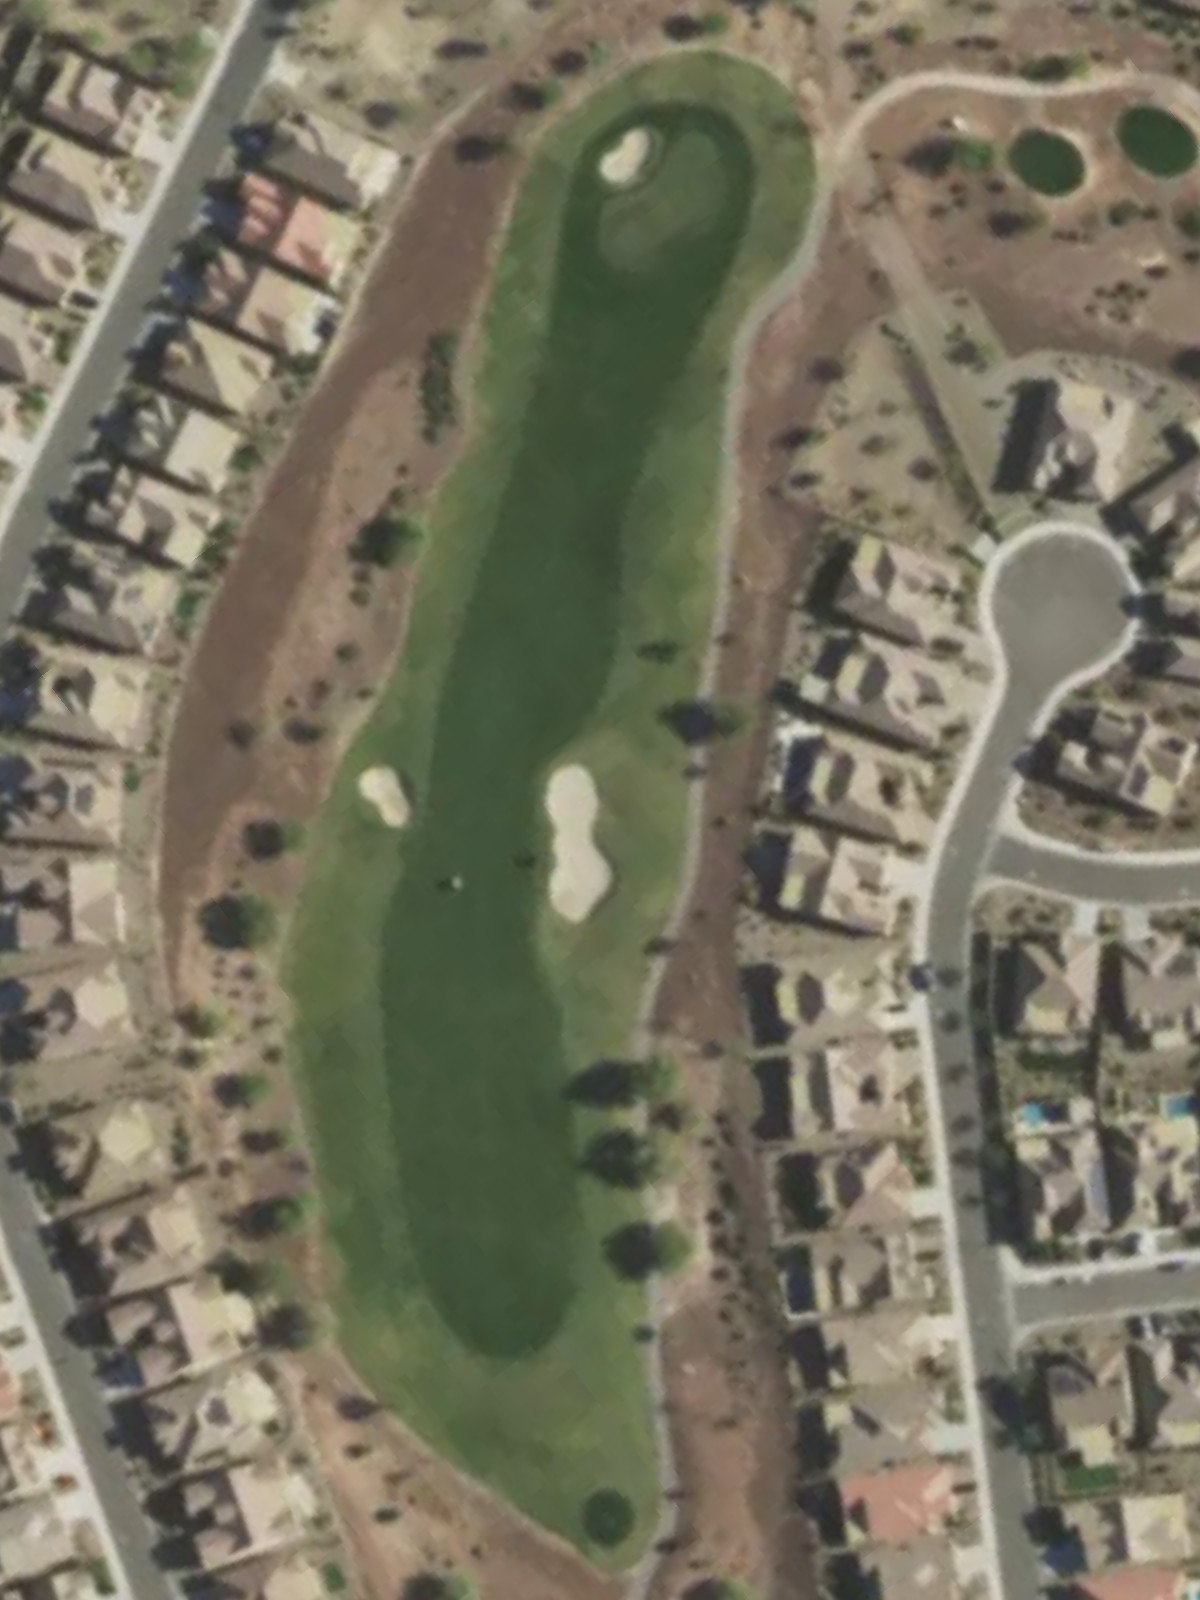
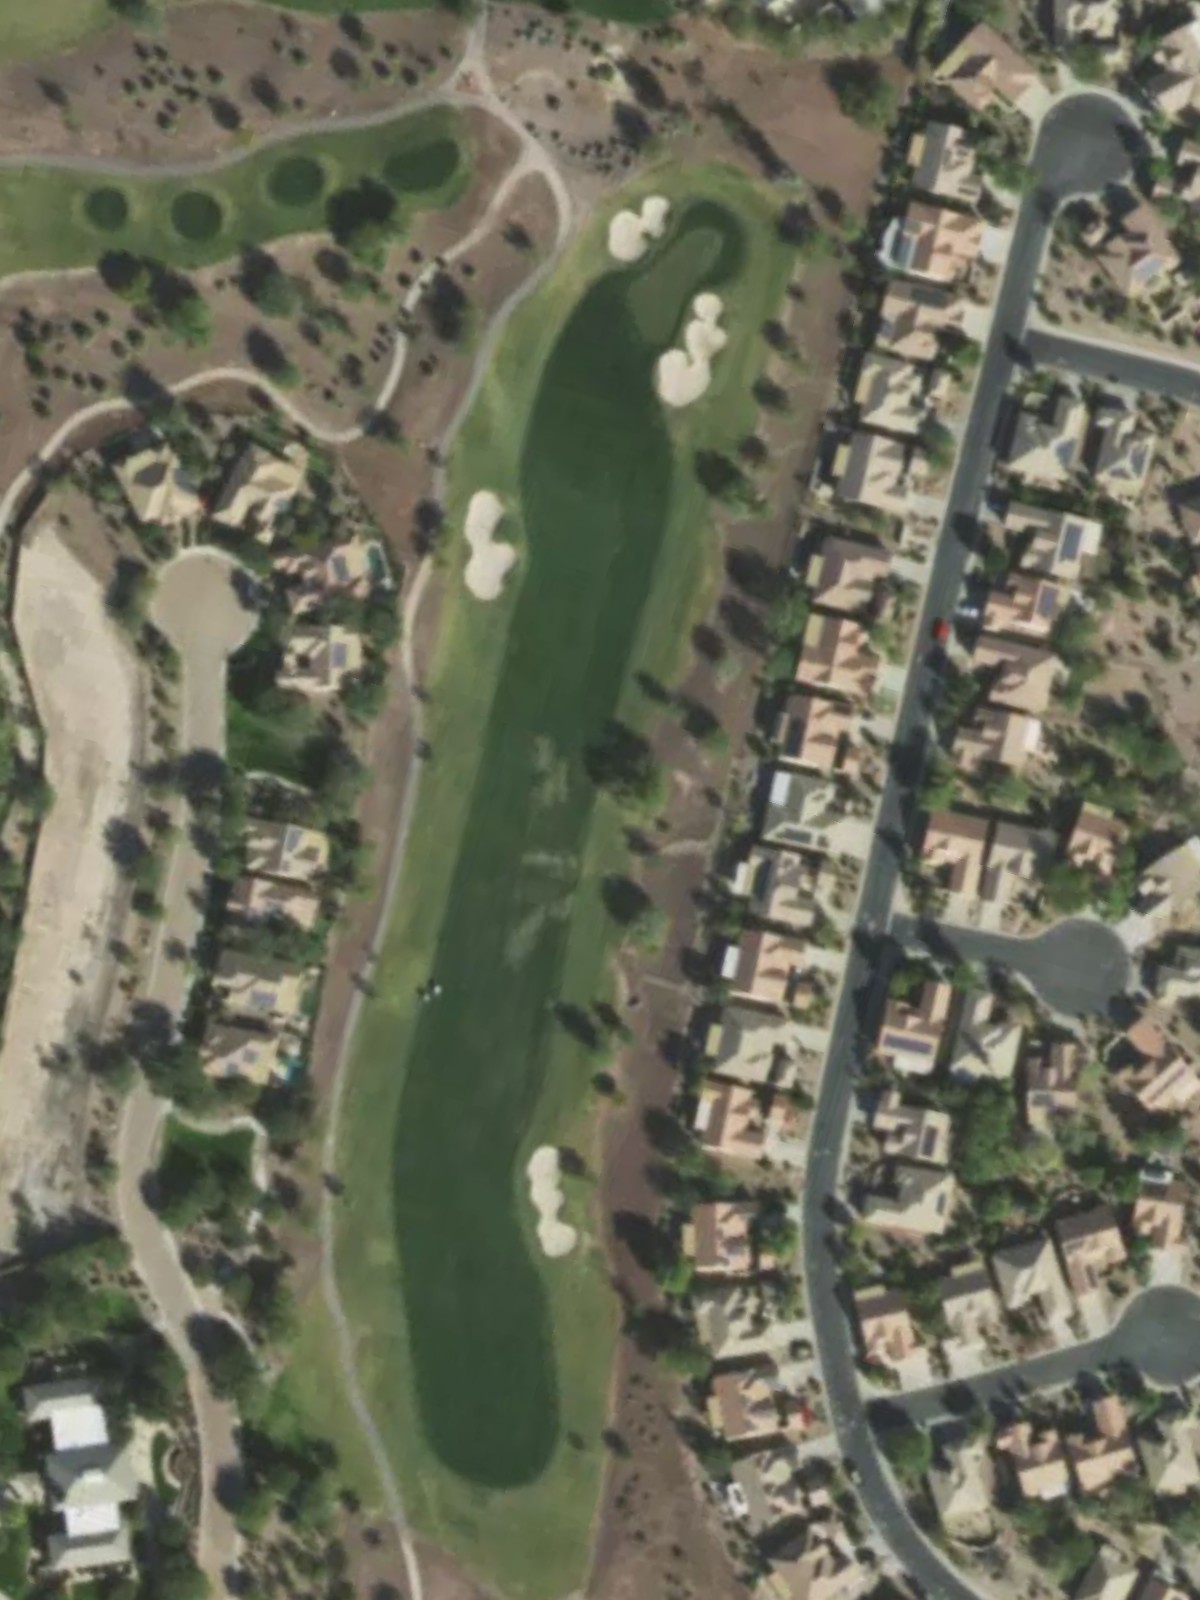
A short par 3 that requires precision over distance to find the green. The modest yardage belies the challenge of accuracy, as bunkers and surrounding hazards punish poor tee shots to this elevated or well-bunkered green.
A reachable par 4 with a relatively straightforward routing that offers scoring opportunity. The shorter length allows players to be aggressive, though bunkers and fairway contours demand solid contact to set up a makeable approach.
The #3 handicap hole presents a significant par 4 challenge with length and strategic hazards in play. A well-bunkered green and potentially narrow fairway corridors require both distance and accuracy to navigate successfully.
A short par 3 with minimal yardage but genuine teeth in its design. The small green and surrounding bunkers make this a precision-demanded hole where distance control is paramount despite the brief yardage.
A solid par 4 with good scoring opportunity from proper positioning off the tee. Fairway shape and bunker placement reward well-executed drives, setting up a manageable approach to a relatively accessible green.

The #5 handicap hole, this par 5 tests all aspects of play despite its mid-field handicap ranking. Strategic water hazards and bunker placement throughout the hole create decision points for players of all skill levels eyeing birdie.
The #2 handicap hole demands excellence with length and strategic complexity as defining characteristics. Bunkers, water, and a well-defended green make this par 4 one of the course's most testing holes requiring two strong shots.

A solid mid-length par 4 with balanced difficulty and birdie potential. Fairway bunkers and a modestly defended green create strategic options, while the hole's routing offers interest without overwhelming difficulty.
A short par 3 where precision trumps power in reaching a small, well-protected green. Bunkers and hazards surrounding the putting surface demand accurate tee shots despite the modest distance.
A par 5 with ample length that stretches across the course and rewards strategic positioning. Multiple decision points and hazard placement throughout the hole create a compelling three-shot test with birdie still in reach for solid players.
The #4 handicap hole presents a formidable par 4 with length and strategic hazards in prominent positions. A well-bunkered green and potentially challenging fairway routing make this hole demand two accomplished shots for a successful score.
A shorter par 4 offering significant scoring opportunity with manageable length and relatively open fairway. The modest yardage and accessible green make birdie achievable, though bunkers and hazards still demand respect.
A par 4 with balanced length and strategic interest requiring solid tee-to-green execution. Bunker placement and green contours create a fair but demanding challenge that rewards accurate drives and measured approaches.
The shortest par 3 on the course, this hole relies entirely on precision and distance control to a small, protected green. Despite minimal yardage, bunkers and surrounding hazards make accuracy the paramount skill for a successful tee shot.
The finishing par 5 provides a closing three-shot opportunity with strategic complexity and length in play. A potentially dramatic finish with water and bunker placement throughout rewards bold, accurate play while penalizing mistakes on this strong finishing hole.
Scorecard
| Hole | 1 | 2 | 3 | 4 | 5 | 6 | 7 | 8 | 9 | Out | 10 | 11 | 12 | 13 | 14 | 15 | 16 | 17 | 18 | In | Tot |
|---|---|---|---|---|---|---|---|---|---|---|---|---|---|---|---|---|---|---|---|---|---|
| Par | 4 | 4 | 5 | 3 | 4 | 4 | 3 | 4 | 5 | 36 | 4 | 4 | 3 | 5 | 4 | 4 | 4 | 3 | 5 | 36 | 72 |
| HCP | 11 | 1 | 13 | 9 | 17 | 3 | 15 | 7 | 5 | 2 | 6 | 14 | 10 | 4 | 16 | 8 | 12 | 18 | |||
| gold | 364 | 471 | 616 | 235 | 354 | 455 | 166 | 428 | 544 | 3633 | 466 | 416 | 193 | 596 | 460 | 352 | 433 | 169 | 564 | 3649 | 7282 |
| black | 338 | 455 | 583 | 207 | 333 | 427 | 152 | 399 | 523 | 3417 | 431 | 389 | 177 | 565 | 430 | 327 | 400 | 147 | 537 | 3403 | 6820 |
| black/white | 338 | 428 | 583 | 194 | 333 | 404 | 152 | 369 | 523 | 3324 | 399 | 389 | 156 | 565 | 405 | 327 | 370 | 147 | 499 | 3257 | 6581 |
| white | 312 | 428 | 545 | 194 | 308 | 404 | 131 | 369 | 498 | 3189 | 399 | 358 | 156 | 532 | 405 | 296 | 370 | 117 | 499 | 3132 | 6321 |
| white/red | 312 | 399 | 545 | 165 | 308 | 377 | 131 | 340 | 498 | 3075 | 374 | 358 | 135 | 532 | 380 | 296 | 334 | 117 | 465 | 2991 | 6066 |
| mc combo white/red | 286 | 399 | 474 | 165 | 281 | 377 | 121 | 340 | 475 | 2918 | 399 | 358 | 156 | 532 | 405 | 296 | 370 | 117 | 499 | 3132 | 6050 |
| red | 286 | 399 | 474 | 165 | 281 | 377 | 121 | 340 | 475 | 2918 | 374 | 332 | 135 | 499 | 380 | 270 | 334 | 96 | 465 | 2885 | 5803 |
| mc combo red/green | 265 | 371 | 443 | 141 | 268 | 341 | 96 | 307 | 443 | 2675 | 374 | 332 | 135 | 499 | 380 | 270 | 334 | 96 | 465 | 2885 | 5560 |
| red/green | 286 | 371 | 474 | 141 | 281 | 341 | 121 | 307 | 475 | 2797 | 336 | 332 | 114 | 499 | 358 | 270 | 308 | 96 | 422 | 2735 | 5532 |
| green | 265 | 371 | 443 | 141 | 268 | 341 | 96 | 307 | 443 | 2675 | 336 | 302 | 114 | 468 | 358 | 245 | 308 | 75 | 422 | 2628 | 5303 |