Inglewood Golf Club is an 18-hole golf course in Kenmore, WA with a par of 72. It offers 7 tee sets: black (6,940 yards, slope 143, rating 74.1), blue/black (6,671 yards, slope 140, rating 72.8), blue (6,476 yards, slope 137, rating 72.1), blue/white (6,162 yards, slope 134, rating 70.3), white (5,813 yards, slope 129, rating 69.3), white/gold (5,344 yards, slope 121, rating 66.9), gold (4,909 yards, slope 113, rating 64.3). The hardest hole is #7, a par 5 playing 544 yards from the first tee.
Inglewood Golf Club
Kenmore, WA
Get PDF Yardage Book
We'll email you the PDF link. No spam, ever.
Create Your Game Plan
Pick your tees, enter your bag, and get a personalized shot-by-shot strategy for every hole.

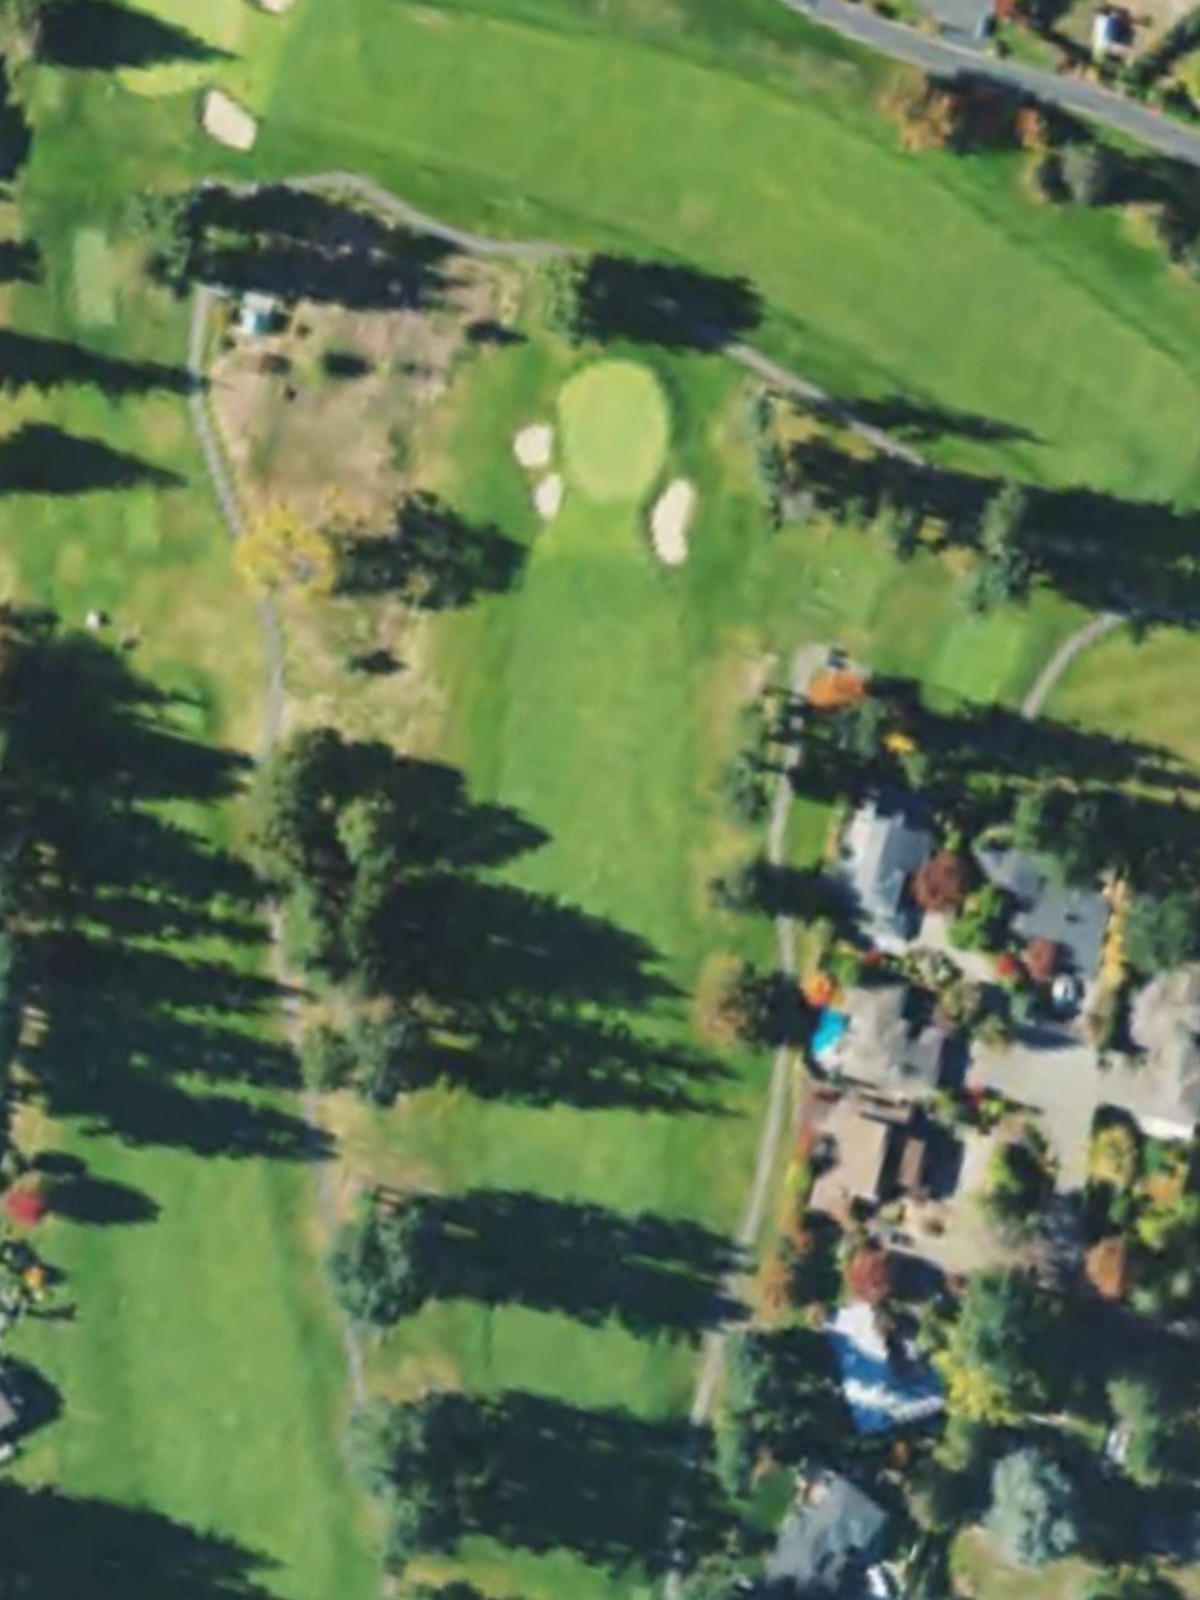
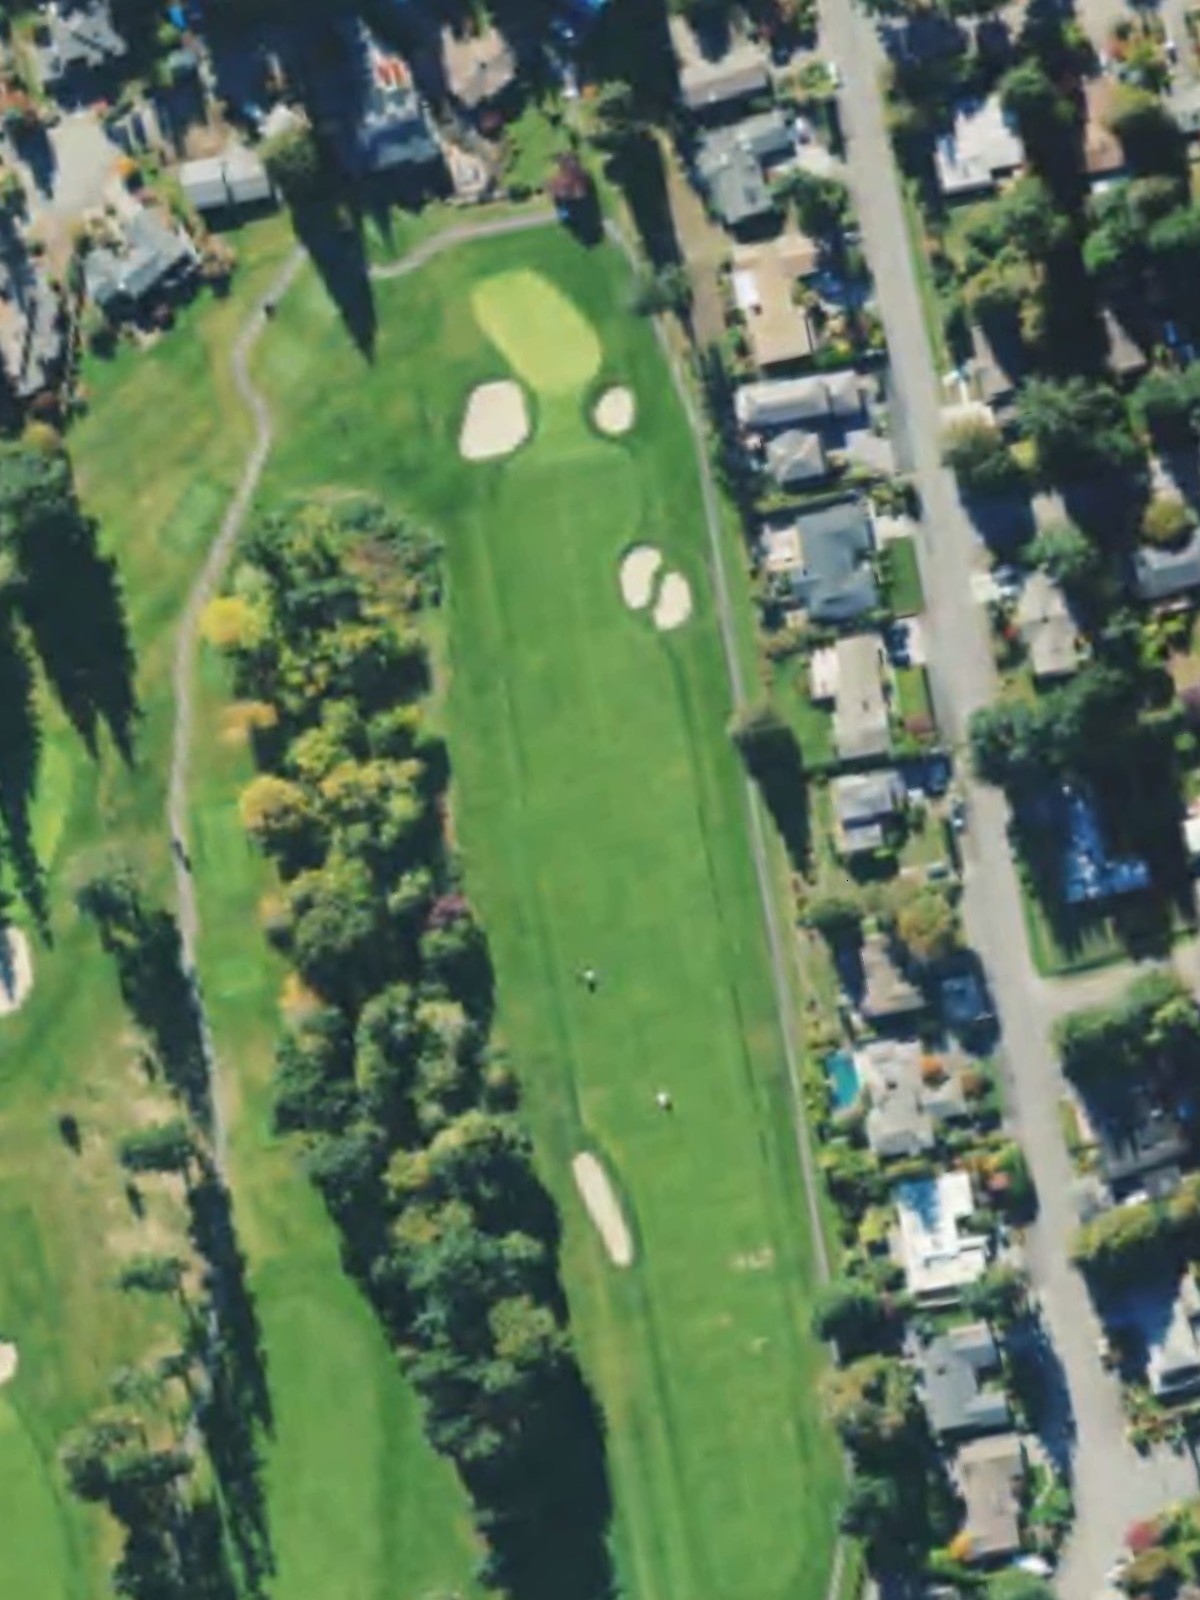
A long par 5 that plays straightaway with a fairway that gradually widens through the middle of the hole. The approach to the green requires careful positioning, as bunkers and rough frame both sides of the landing area, demanding precision on the second and third shots.

A demanding par 4 with a narrow, tree-lined corridor that must be navigated off the tee. Out-of-bounds lurks along one side, and the green is well-bunkered, making this Handicap 3 hole one of the course's most formidable short fours.

A short par 4 that appears deceptively simple but features a tight landing area between hazards. The compact distance makes this a scoring opportunity, though placement remains critical to avoid trouble around the green.

A mid-length par 4 with a fairway that bends slightly and narrows in the approach zone. Strategic bunkering near the green forces golfers to position their drives carefully for a clear second shot.

A straightforward par 4 with a moderate-width fairway that gradually narrows toward the green. Greenside bunkers frame the approach, and the hole's length from the back tees makes it a serious test of distance and accuracy.

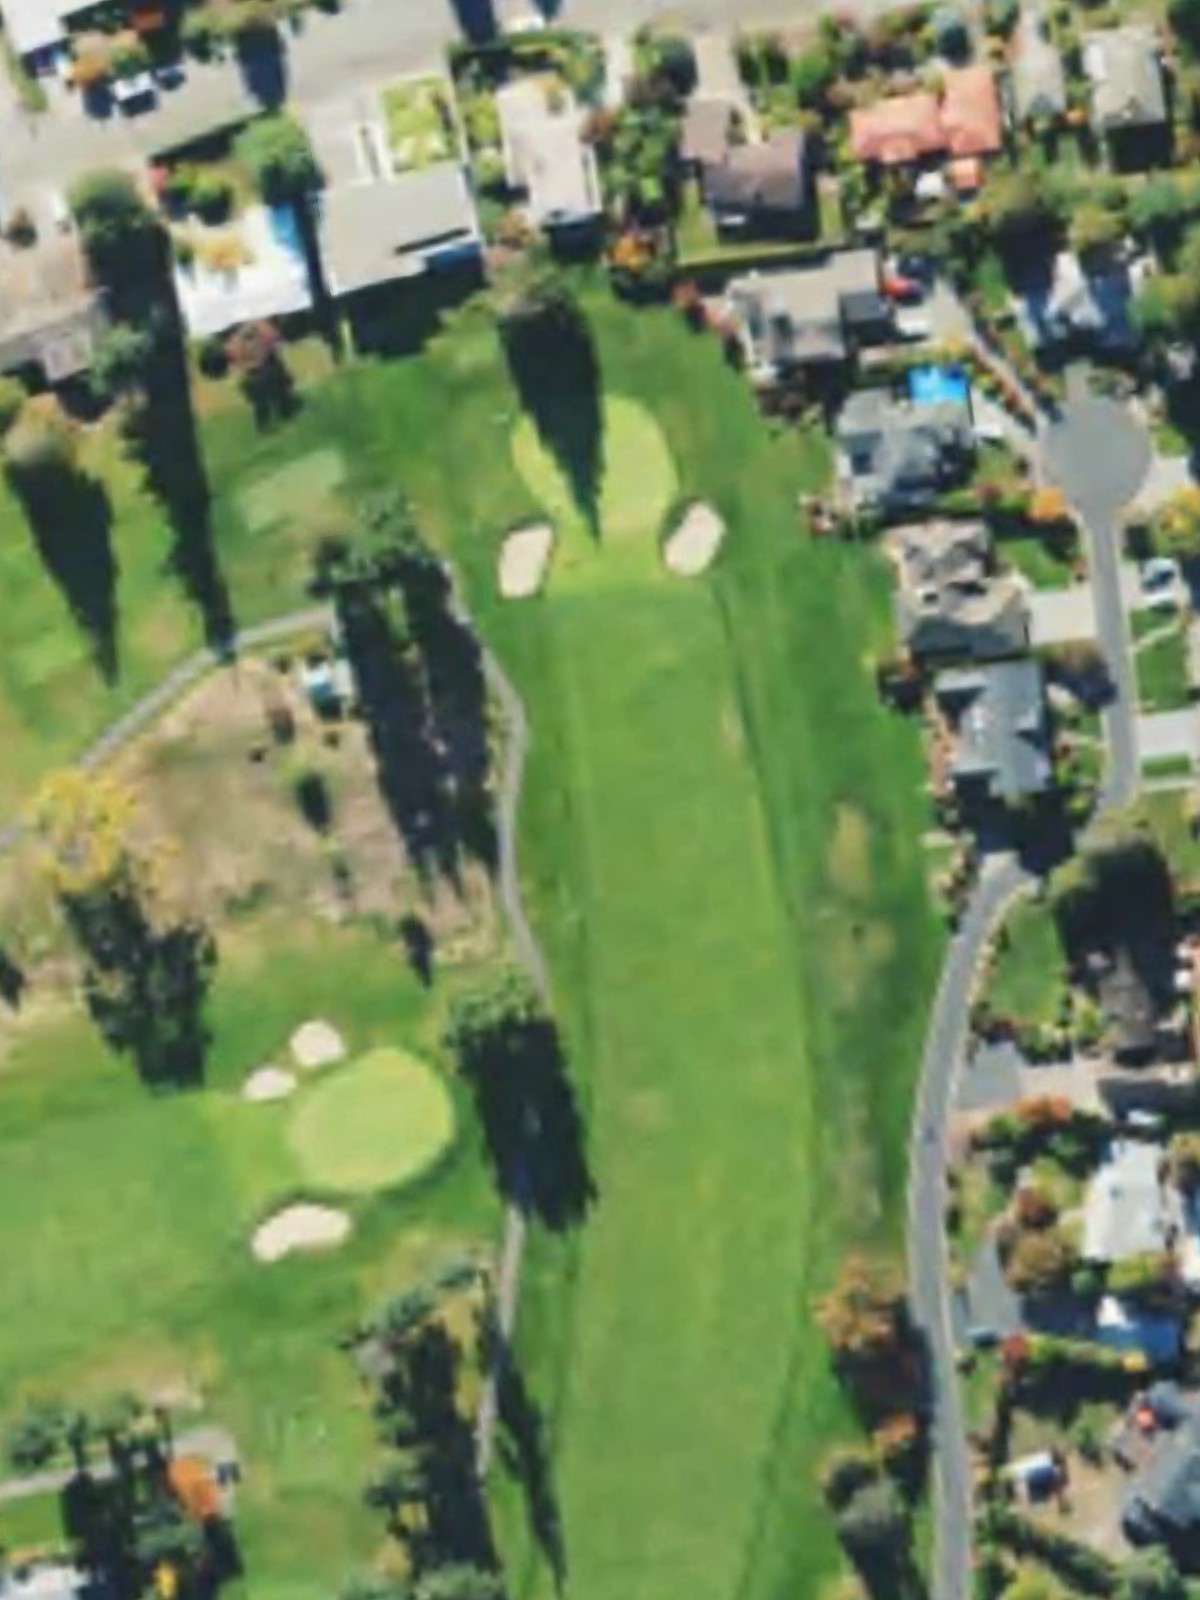
A mid-length par 3 played to an elevated green protected by bunkers and rough. The hole's exposed position makes wind a significant factor, and the lack of bail-out area demands a confident, accurate tee shot.

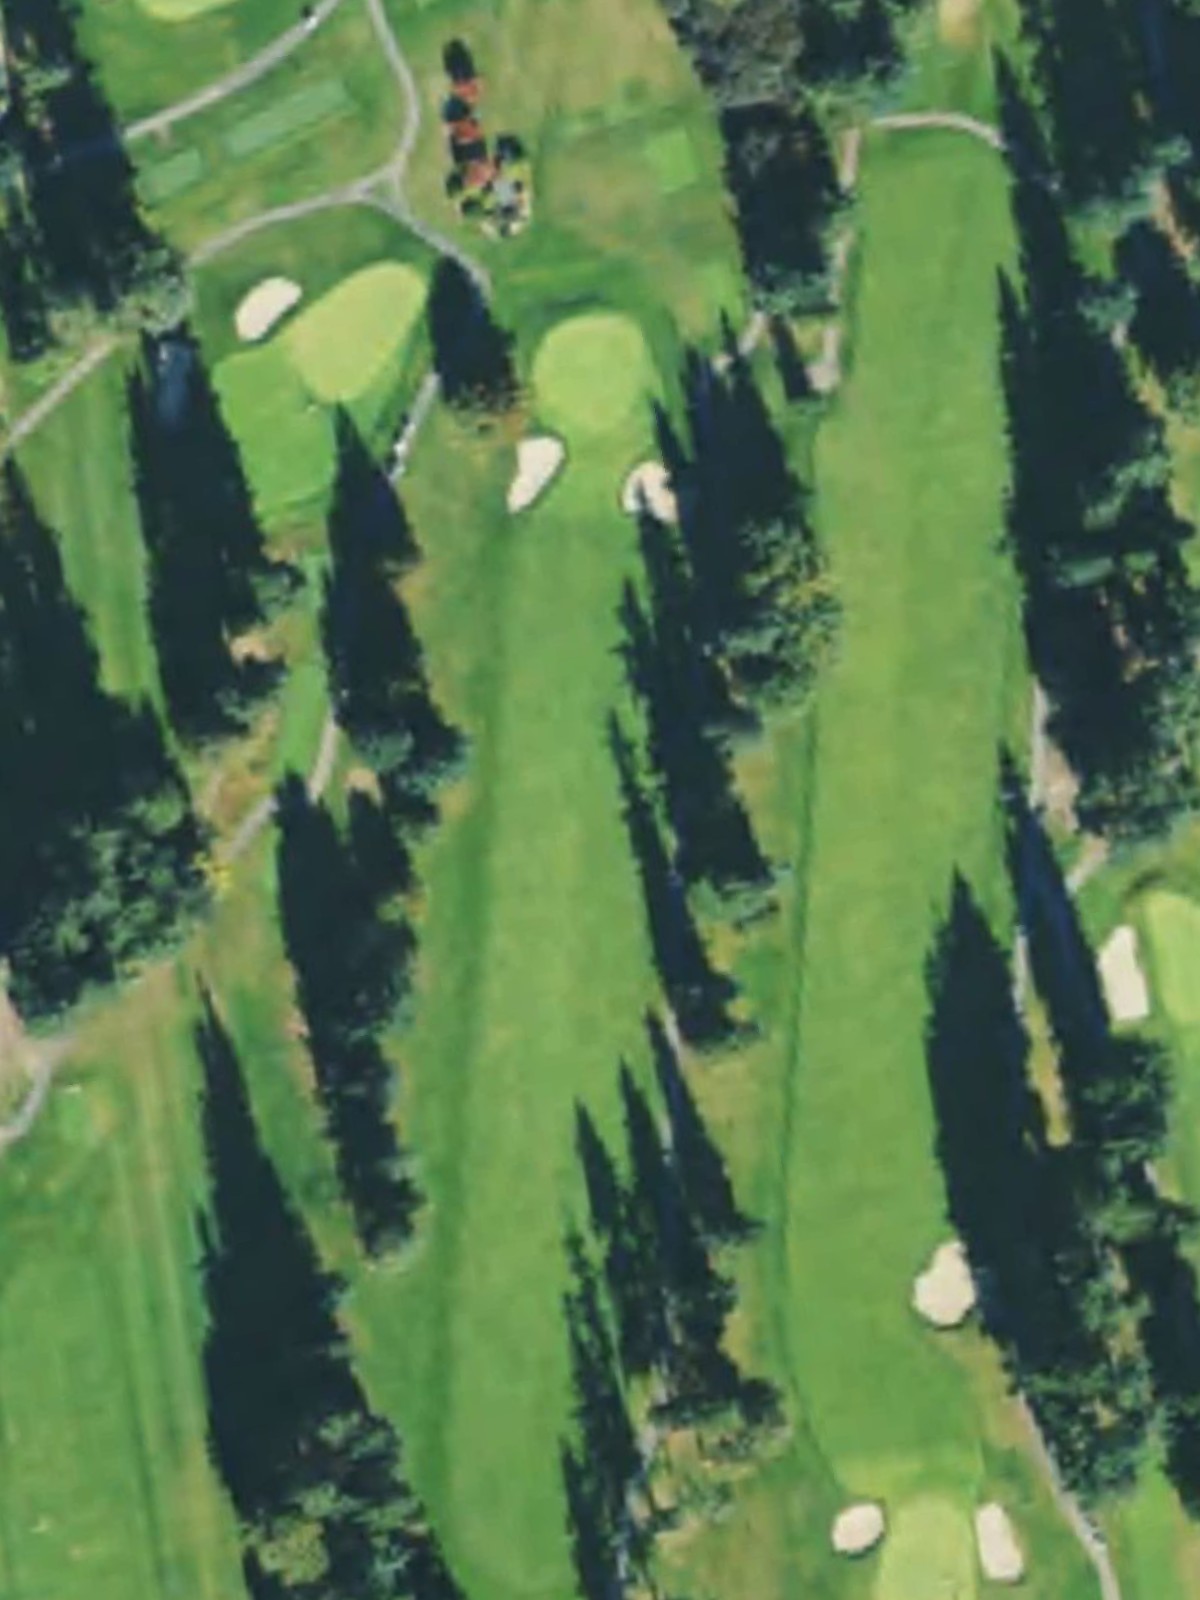
The longest par 5 on the course and the most difficult hole, featuring a dramatic dogleg that curves around hazards. The fairway opens at the driving area but tightens considerably on the approach, rewarding aggressive play that threads the needle between trouble.

A short par 3 with minimal room for error, featuring a small green surrounded by bunkers and trouble. The hole's length varies significantly with tee selection, but the confined target area makes it one of the course's toughest short holes.

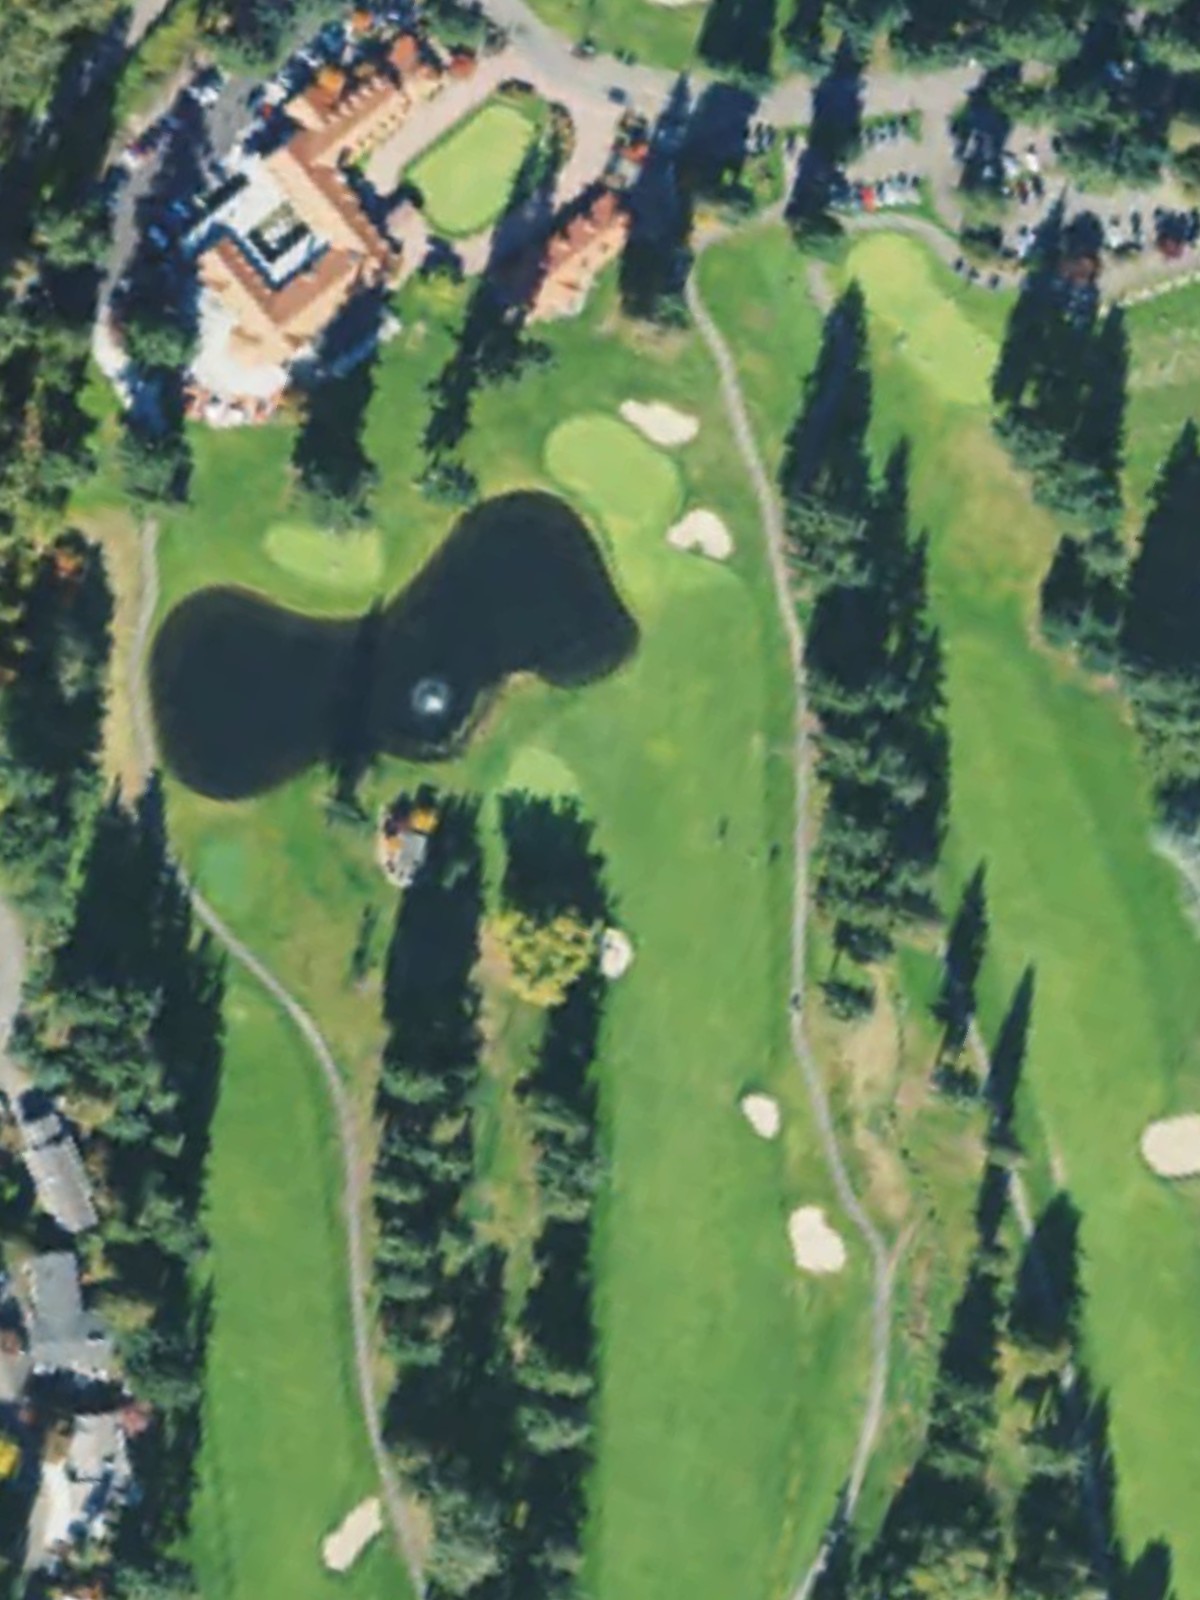
A solid par 4 with a fairway that narrows progressively toward the green. Water or wetland hazards may come into play on the approach, and greenside bunkers require precise positioning off the tee to set up a comfortable second shot.

A strategic par 4 and the second-hardest hole on the course, featuring a fairway that demands accurate placement. Out-of-bounds or significant trouble frames one side, and the well-bunkered green punishes anything short or offline.
A mid-length par 4 with a fairway that narrows in the landing zone and approaches the green. Bunkers guard the green complex on both sides, and the hole's difficulty is amplified from the black tees where length becomes a major factor.
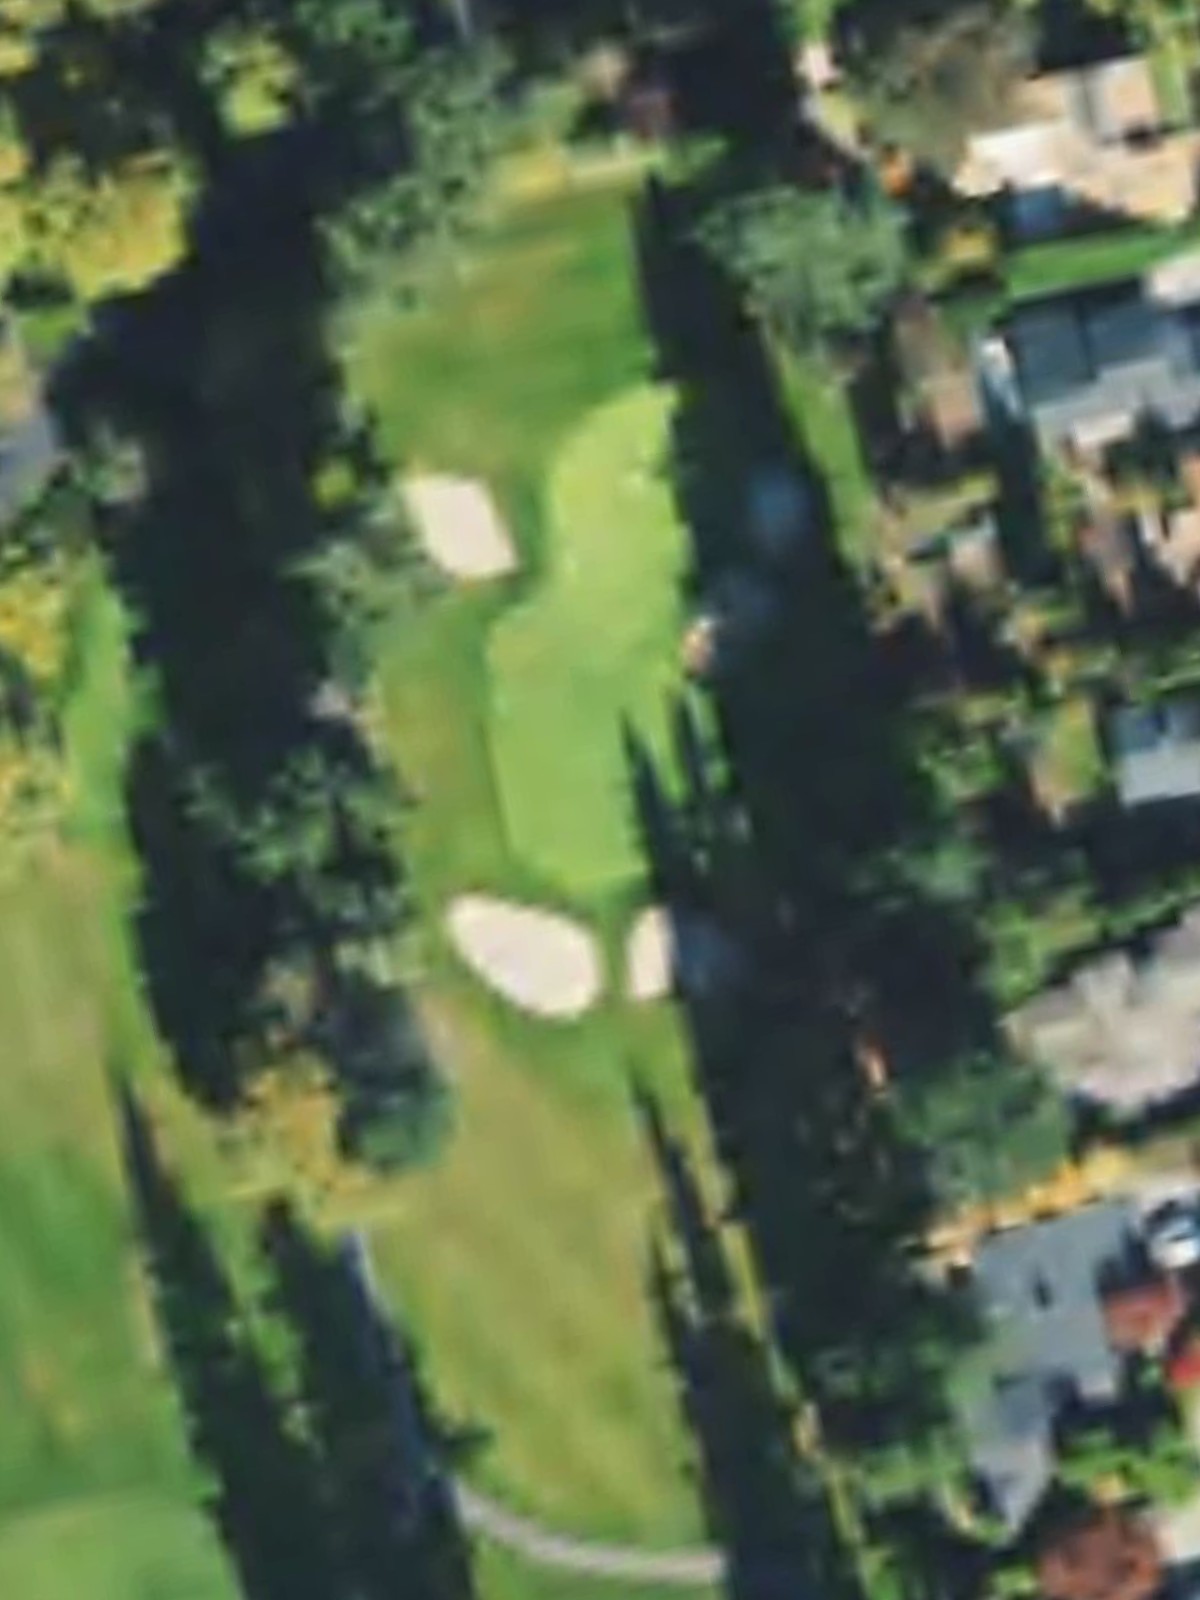
The shortest par 3 on the course, but its tiny green and severe bunkering make it deceptively difficult. The lack of intermediate landing areas means the tee shot must be precise, with little room for imprecision.
A short par 4 with a generous fairway that opens invitingly off the tee. The approach narrows significantly, with bunkers and hazards tightening around the green, creating a risk-reward dynamic for the second shot.
A challenging par 4 that stretches considerably from the back tees, with a fairway that bends and tightens toward the approach zone. Strategic bunkering and rough frame the landing area, making club selection and placement critical to reach the green in regulation.
A mid-length par 5 with a relatively open fairway in the driving zone that narrows significantly on the approach. The hole's length makes three shots the likely scenario, and greenside hazards require careful club selection on the final approach.
A short par 3 with a modest green protected by bunkers and surrounding rough. The hole plays considerably longer from the back tees, and its exposed nature means wind and club selection are paramount to reaching the small target area.
A dramatic par 4 with a fairway that bends around a significant hazard, encouraging aggressive play off the tee. The approach shot must navigate the green complex's bunkers and trouble, rewarding those who position their drives carefully.
A finishing par 5 that plays relatively straightforward but demands control throughout. The fairway remains fairly open through the landing zone, but greenside bunkers and hazards require a measured approach on the final two shots to close out the round.
Scorecard
| Hole | 1 | 2 | 3 | 4 | 5 | 6 | 7 | 8 | 9 | Out | 10 | 11 | 12 | 13 | 14 | 15 | 16 | 17 | 18 | In | Tot |
|---|---|---|---|---|---|---|---|---|---|---|---|---|---|---|---|---|---|---|---|---|---|
| Par | 5 | 4 | 4 | 4 | 4 | 3 | 5 | 3 | 4 | 36 | 4 | 4 | 3 | 4 | 4 | 5 | 3 | 4 | 5 | 36 | 72 |
| HCP | 5 | 3 | 13 | 11 | 9 | 15 | 1 | 17 | 7 | 2 | 6 | 18 | 12 | 8 | 4 | 16 | 10 | 14 | |||
| black | 521 | 432 | 297 | 387 | 408 | 210 | 587 | 214 | 420 | 3476 | 403 | 427 | 171 | 349 | 458 | 478 | 212 | 436 | 530 | 3464 | 6940 |
| blue/black | 521 | 424 | 297 | 387 | 408 | 210 | 544 | 202 | 396 | 3389 | 403 | 373 | 171 | 349 | 403 | 478 | 212 | 390 | 503 | 3282 | 6671 |
| blue | 488 | 424 | 287 | 368 | 398 | 180 | 544 | 202 | 396 | 3287 | 380 | 373 | 162 | 340 | 403 | 445 | 193 | 390 | 503 | 3189 | 6476 |
| blue/white | 488 | 356 | 287 | 343 | 398 | 180 | 515 | 202 | 335 | 3104 | 352 | 351 | 162 | 340 | 403 | 414 | 174 | 359 | 503 | 3058 | 6162 |
| white | 439 | 356 | 266 | 343 | 333 | 163 | 515 | 172 | 335 | 2922 | 352 | 351 | 143 | 269 | 358 | 414 | 174 | 359 | 471 | 2891 | 5813 |
| white/gold | 378 | 261 | 266 | 343 | 333 | 163 | 464 | 142 | 335 | 2685 | 271 | 266 | 143 | 269 | 358 | 348 | 174 | 359 | 471 | 2659 | 5344 |
| gold | 378 | 261 | 215 | 292 | 320 | 137 | 464 | 142 | 286 | 2495 | 271 | 266 | 127 | 231 | 315 | 348 | 128 | 324 | 404 | 2414 | 4909 |