Falcon Lakes Golf Club is an 18-hole golf course in Basehor, KS with a par of 72. It offers 9 tee sets: black (7,044 yards, slope 133, rating 75.3), black/blue (6,760 yards, slope 130, rating 73.8), blue (6,544 yards, slope 131, rating 72.6), blue/white (6,303 yards, slope 128, rating 71.7), white (6,102 yards, slope 125, rating 70.9), white/gold (5,719 yards, slope 121, rating 68.9), gold (5,515 yards, slope 118, rating 68), gold/red (5,041 yards, slope 113, rating 65.8), red (4,509 yards, slope 108, rating 63.7). The hardest hole is #12, a par 4 playing 328 yards from the first tee.
Falcon Lakes Golf Club
Basehor, KS
Get PDF Yardage Book
We'll email you the PDF link. No spam, ever.
Create Your Game Plan
Pick your tees, enter your bag, and get a personalized shot-by-shot strategy for every hole.
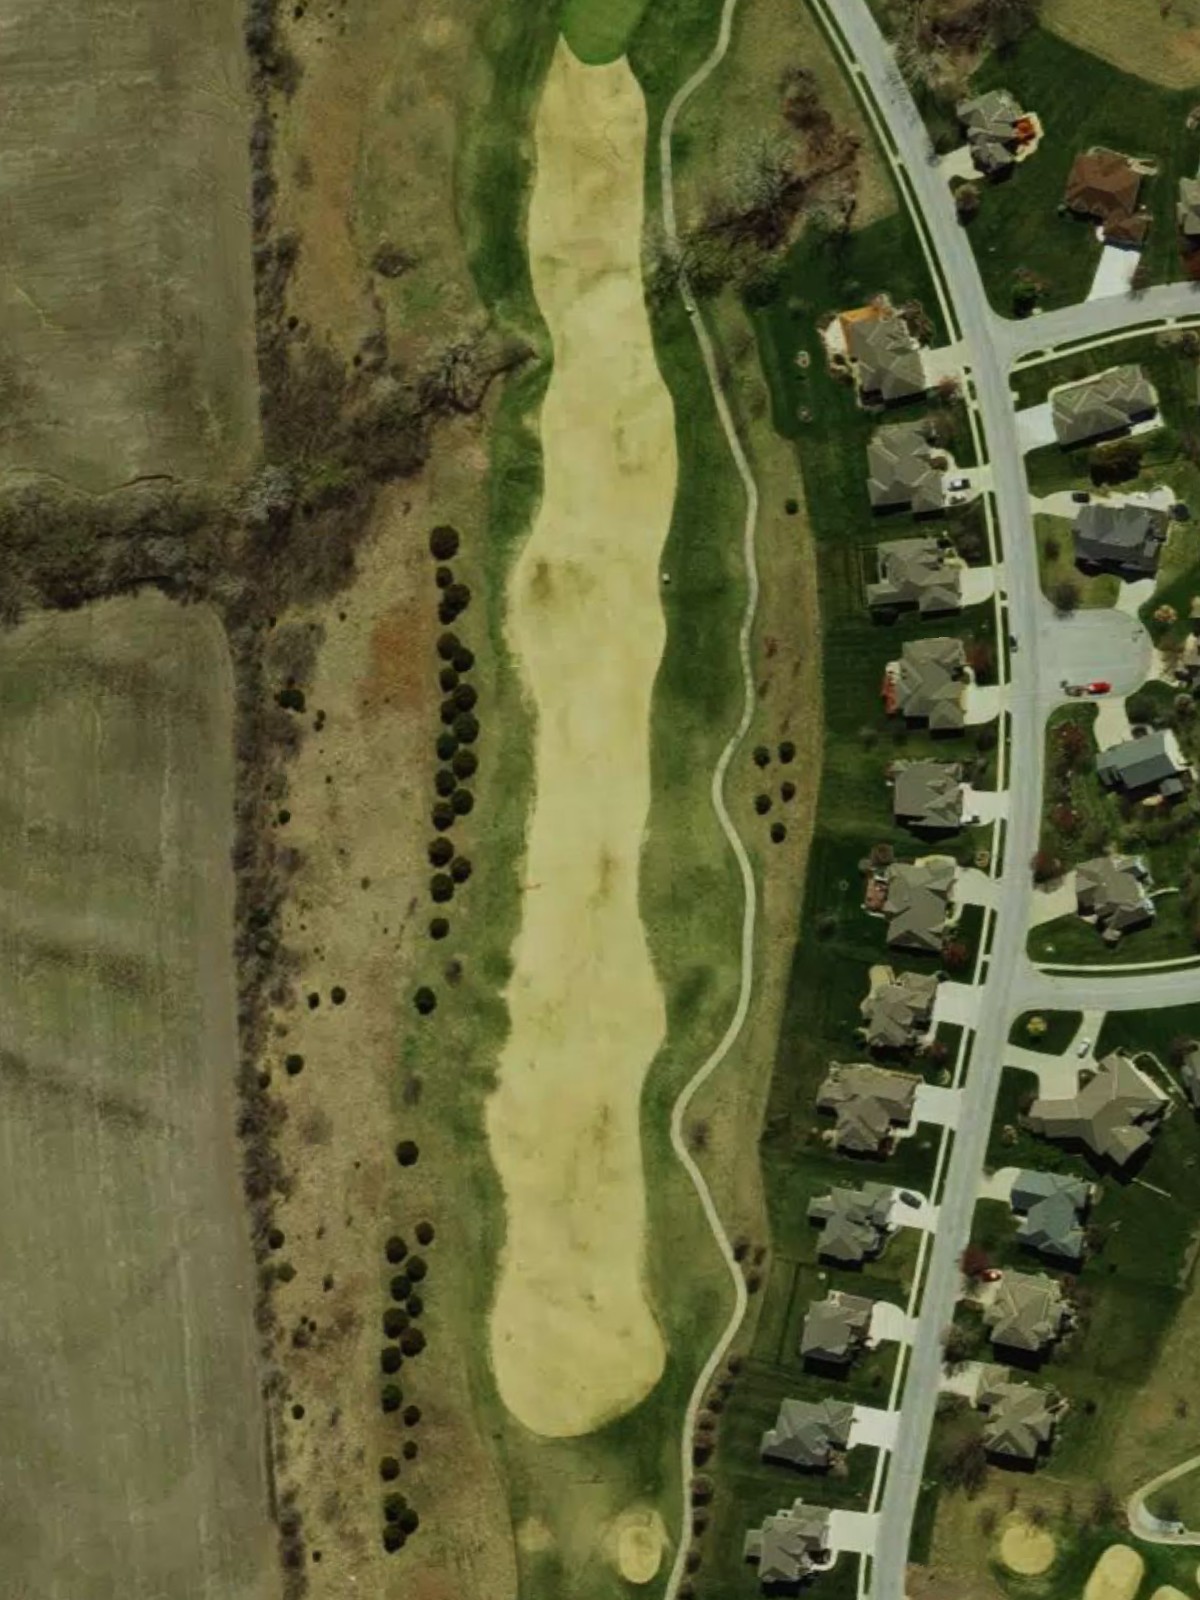
A reachable par 5 that plays as an inviting three-shotter for most players, with a fairway that gradually widens off the tee. The approach to the green requires precision, as bunkers and potentially water hazards frame the landing areas, rewarding accurate positioning over distance.
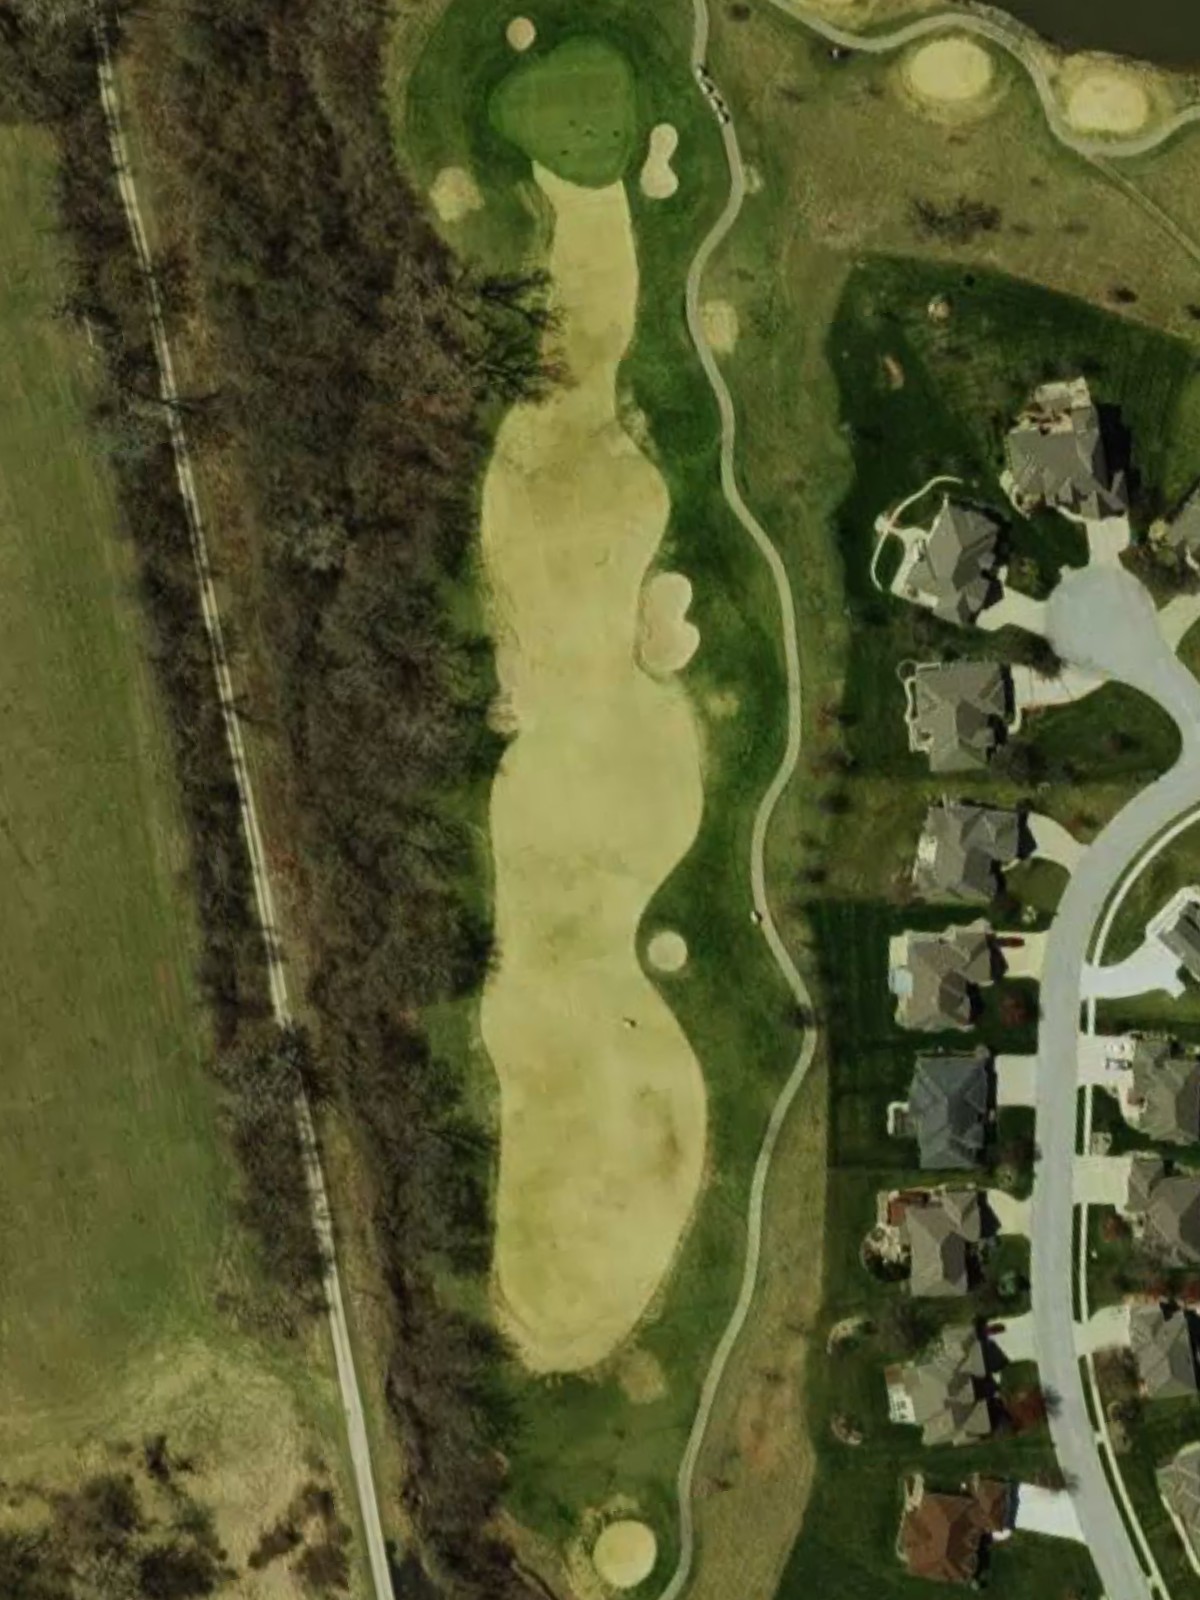
A straightforward par 4 with a relatively open fairway that provides a clear sight line to the green. The modest length makes accuracy more important than power, with any hazards tightly positioned near the green to penalize imprecise approaches.
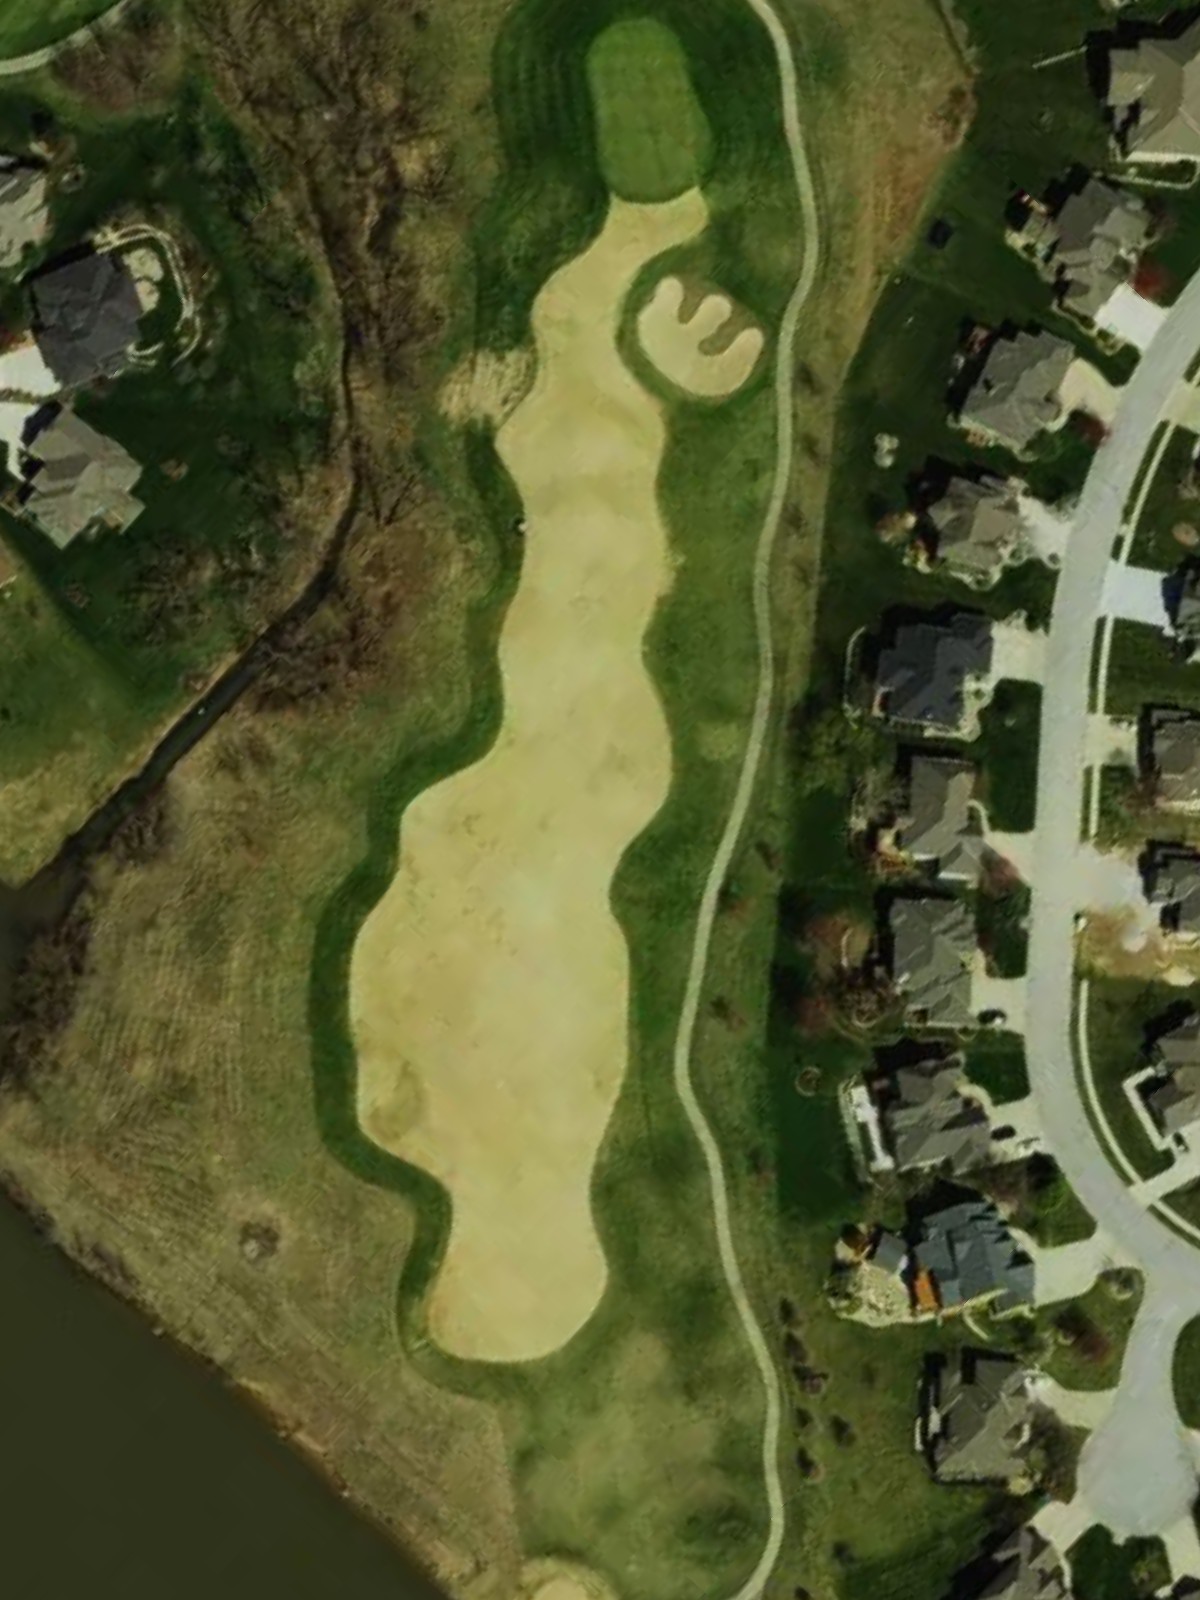
A short par 3 requiring only a wedge or short iron to a well-exposed green. The simplicity of this hole offers a birdie opportunity, though precision from the tee is essential to avoid any surrounding trouble.
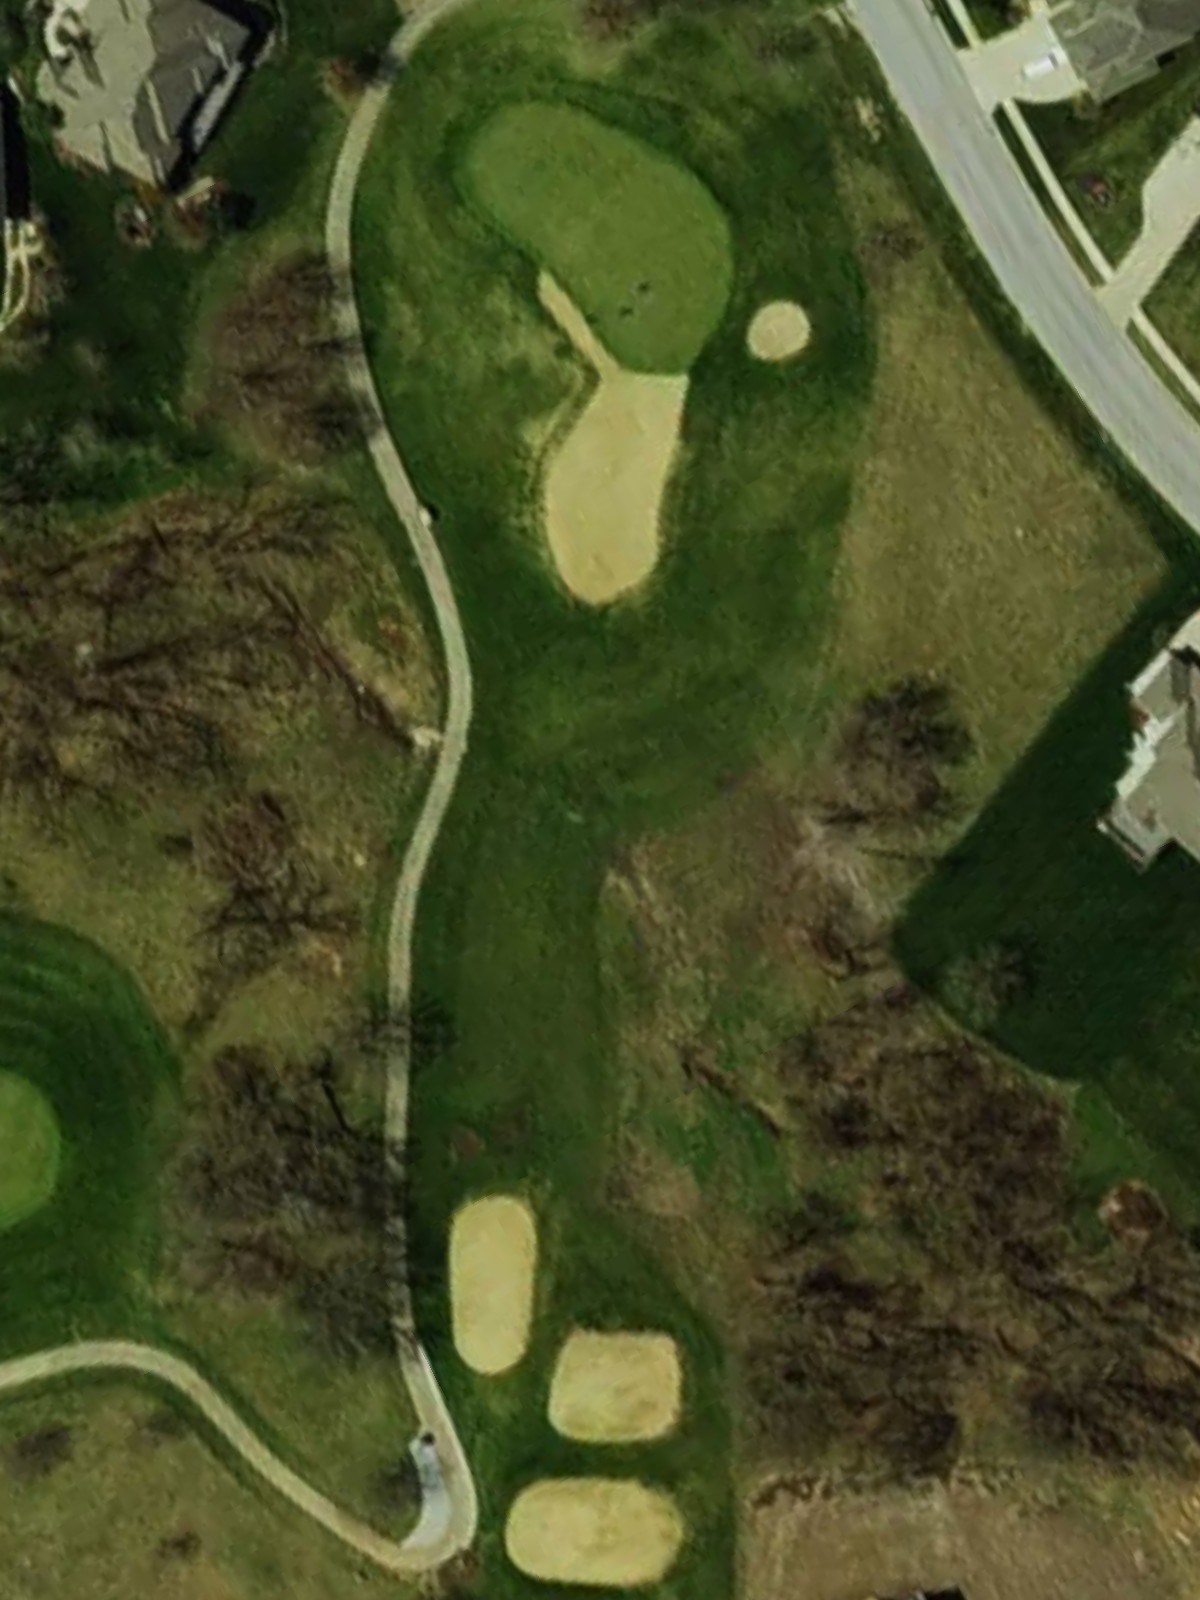
A mid-length par 4 with a fairway that provides reasonable width off the tee. The green presents the primary challenge, likely defended by bunkers or other hazards that demand an accurate approach shot.
The #2 handicap hole presents a significant test as a longer par 5 requiring two solid shots to reach scoring position. Strategic placement of hazards—likely water or bunkers in the landing zones—forces careful club selection on both the drive and second shot.
A drivable par 4 with an inviting tee shot, though the fairway likely narrows or slopes in ways that affect the approach. Green-side bunkers or water present the final obstacle to par.
The #4 handicap hole represents one of Falcon Lakes' strongest challenges as a compact par 4 with tight positioning demands. Hazards frame the fairway tightly, leaving little margin for error from both tee and approach.
A short par 3 offering another birdie chance with a straightforward tee shot to a relatively open green. The brevity of the hole makes it accessible, though any surrounding hazards are positioned to catch wayward attempts.
A well-proportioned par 4 with a fairway that flows naturally toward the green. Strategic hazard placement—likely mid-fairway or greenside—creates an interesting risk-reward decision on the approach.
A short par 4 that rewards aggressive play off the tee, with a fairway that opens toward the green for those seeking a shorter approach. Conservative positioning pays dividends if hazards protect the green.
A mid-length par 4 with a straightforward design offering multiple routes to the green. Hazard placement near the green or mid-fairway presents the primary challenge to par.
The #1 handicap hole—Falcon Lakes' most formidable test—stretches significantly and demands two excellent shots to reach scoring position. Hazards are strategically placed throughout to penalize any lapse in accuracy or course management.
A generous par 5 offering three opportunities to reach the green and post a good score. The length and fairway width provide options, though strategic hazard placement likely rewards thoughtful positioning over aggressive play.
The #3 handicap hole plays as a tight, demanding par 4 where precision is paramount from tee to green. Hazards frame the hole tightly throughout, leaving little room for wayward shots.
A mid-length par 3 presenting a moderate challenge with a full swing required from most tees. The green's surroundings likely feature bunkers or other hazards that reward accuracy.
The #5 handicap hole—a lengthy par 5—demands two powerful shots to position for a birdie opportunity. Strategic hazard placement in the landing zones forces careful consideration of risk versus reward on both the drive and second shot.
A very short par 3 offering another genuine scoring opportunity with just a short iron or wedge to the green. The simplicity masks any surrounding trouble, making precise placement from the tee critical.
A finishing par 4 with a fairway that sets up naturally toward the green to conclude the round. The hole's hazard placement—likely framing the green or mid-fairway—determines whether the round ends smoothly or with drama.
Scorecard
| Hole | 1 | 2 | 3 | 4 | 5 | 6 | 7 | 8 | 9 | Out | 10 | 11 | 12 | 13 | 14 | 15 | 16 | 17 | 18 | In | Tot |
|---|---|---|---|---|---|---|---|---|---|---|---|---|---|---|---|---|---|---|---|---|---|
| Par | 5 | 4 | 3 | 4 | 5 | 4 | 4 | 3 | 4 | 36 | 4 | 4 | 4 | 5 | 4 | 3 | 5 | 3 | 4 | 36 | 72 |
| HCP | 8 | 14 | 18 | 10 | 2 | 6 | 4 | 16 | 12 | 15 | 13 | 1 | 9 | 3 | 11 | 5 | 17 | 7 | |||
| black | 510 | 404 | 128 | 421 | 566 | 423 | 430 | 189 | 407 | 3478 | 374 | 389 | 481 | 526 | 438 | 207 | 552 | 192 | 407 | 3566 | 7044 |
| black/blue | 510 | 372 | 128 | 421 | 524 | 415 | 393 | 164 | 407 | 3334 | 374 | 389 | 424 | 526 | 418 | 207 | 515 | 166 | 407 | 3426 | 6760 |
| blue | 468 | 372 | 128 | 387 | 524 | 415 | 393 | 164 | 380 | 3231 | 365 | 368 | 424 | 515 | 418 | 184 | 515 | 166 | 358 | 3313 | 6544 |
| blue/white | 468 | 360 | 128 | 387 | 490 | 390 | 360 | 152 | 380 | 3115 | 365 | 368 | 396 | 515 | 374 | 184 | 483 | 145 | 358 | 3188 | 6303 |
| white | 460 | 360 | 116 | 370 | 490 | 390 | 360 | 152 | 355 | 3053 | 352 | 350 | 396 | 470 | 374 | 160 | 483 | 145 | 319 | 3049 | 6102 |
| white/gold | 460 | 287 | 116 | 370 | 437 | 333 | 315 | 141 | 355 | 2814 | 352 | 350 | 369 | 470 | 315 | 160 | 452 | 118 | 319 | 2905 | 5719 |
| gold | 420 | 287 | 116 | 355 | 437 | 333 | 315 | 141 | 325 | 2729 | 331 | 329 | 369 | 441 | 315 | 136 | 452 | 118 | 295 | 2786 | 5515 |
| gold/red | 420 | 227 | 116 | 355 | 357 | 280 | 275 | 102 | 325 | 2457 | 331 | 329 | 328 | 441 | 279 | 136 | 348 | 97 | 295 | 2584 | 5041 |
| red | 309 | 227 | 92 | 296 | 357 | 280 | 275 | 102 | 301 | 2239 | 218 | 239 | 328 | 383 | 279 | 108 | 348 | 97 | 270 | 2270 | 4509 |